A data analyst's primary responsibility is to convey significant stories visually. This includes gathering, cleaning, and visualizing data, extracting insights, and presenting reports to stakeholders. Performing these tasks manually can be laborious, highlighting the necessity of automation.
In this blog, we will walk through how to:
- Connect to Snowflake DB with KNIME Analytics Platform
- Create a workflow that produces a sales report
- Schedule the workflow to run automatically each month using the KNIME Team plan.
Step 1: Connect to Snowflake and fetch sales data
The Sales data we will use for this case resides on the Snowflake DB, which is a cloud-based data source.To connect to Snowflake, install the KNIME Snowflake Integration extension. Do this by navigating to Menu > Install Extensions.
![help drop]down](https://www.knime.com/sites/default/files/public/2025-04/1-help.png)
Or simply by dragging and dropping this workflow from the KNIME Community Hub.
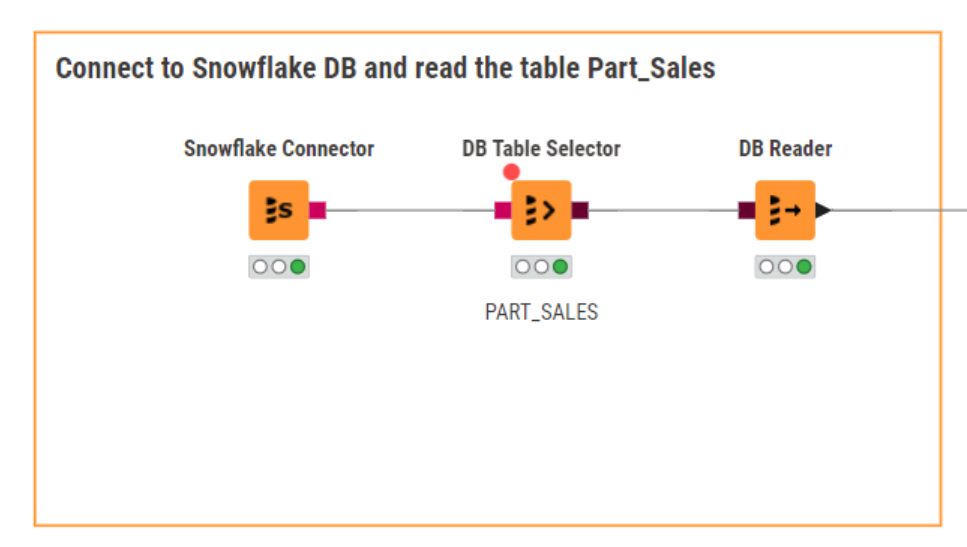
Once you’ve installed the extension, the next step is to use the Snowflake Connector node to connect to the Sales DB.
To configure the node, you need to fill in the appropriate credentials, the Full account name, and the Virtual Warehouse name you want to connect to. You can also find this detailed extension guide on Snowflake extension on our website.

For security reasons, when you deploy this workflow on the hub, in your team space, you don’t want to store the credentials inside the workflow.
Instead, you can use the Credentials Configuration node. The Credentials Configuration node only allows the team admin to pass the credentials while deploying the workflow. You can check this blog for more details. This enables your team members to access the workflow when they need to use it through your team on KNIME Community Hub.
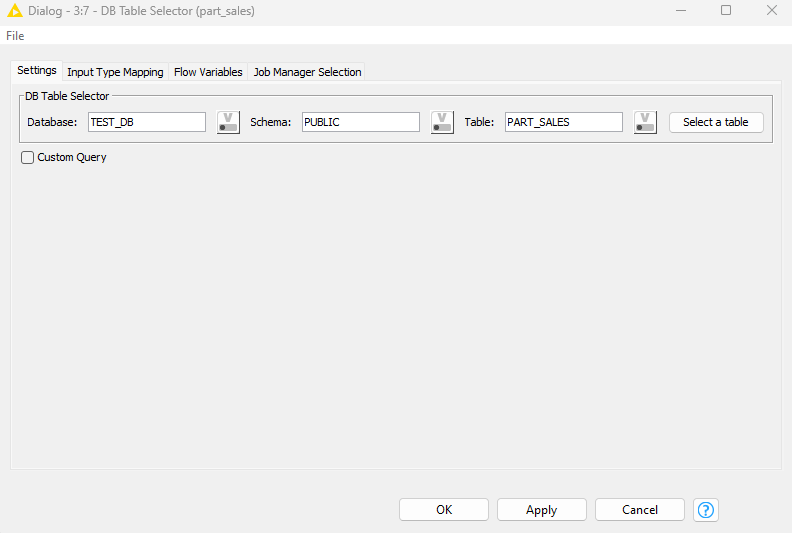
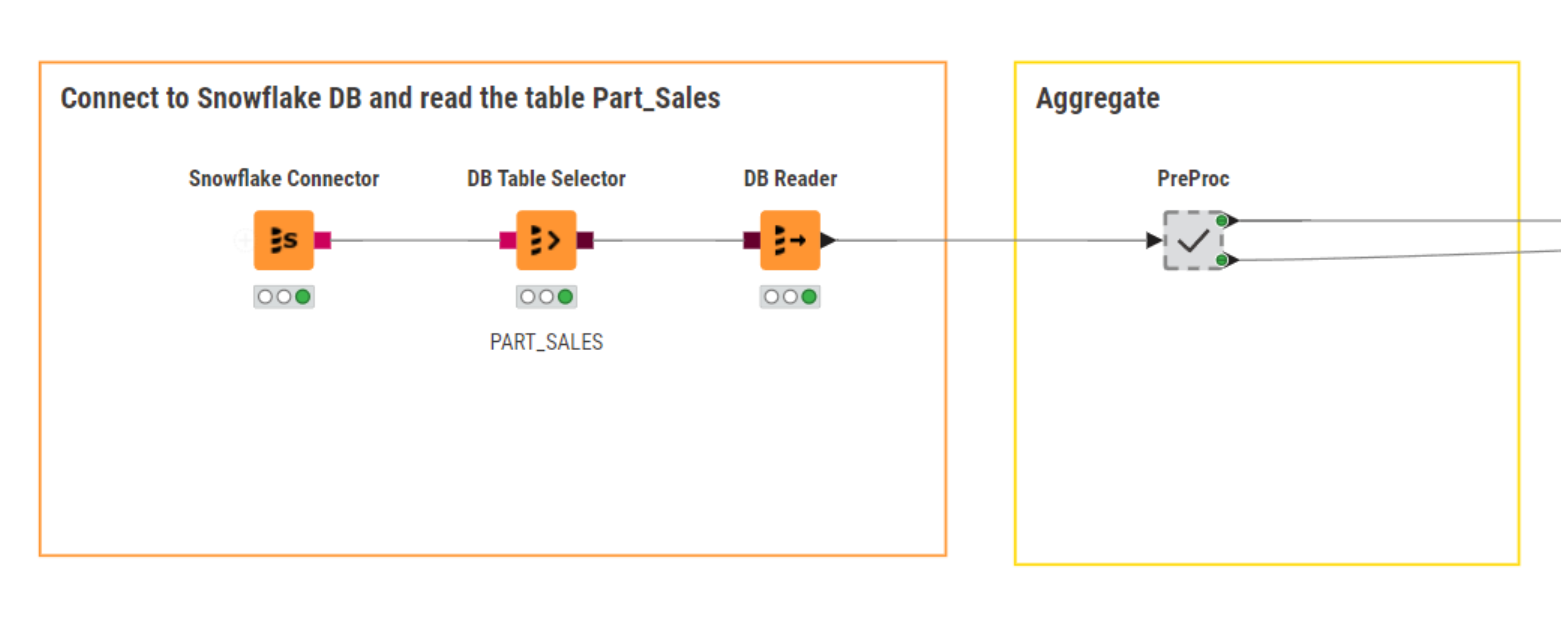
The next step is to use the DB Table Selector node and select the table PART_SALES, as shown in the snapshot below.
Finally, using the DB Reader node, you can read the DB table into KNIME for further processing. So, our connection configuration looks like this.
Step 2: Aggregate and analyze sales trends
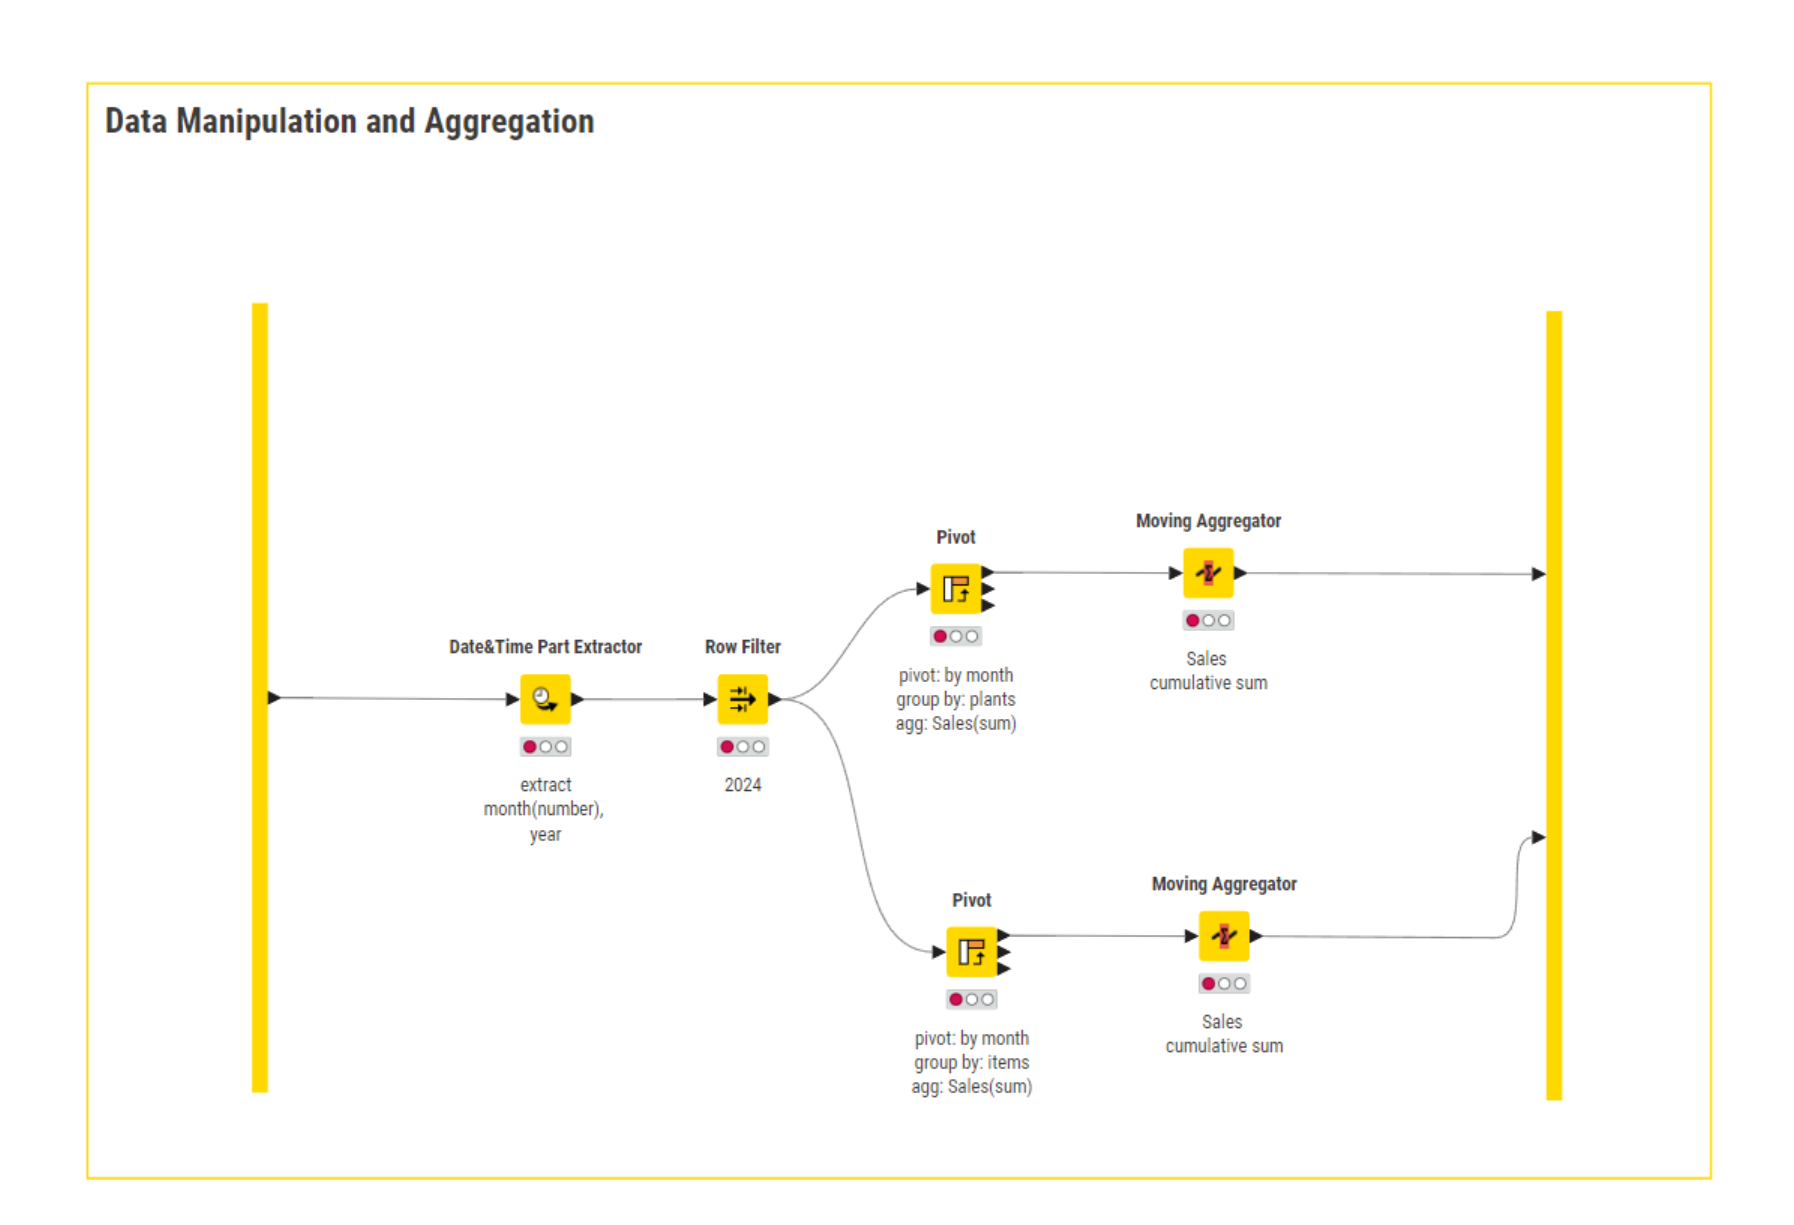
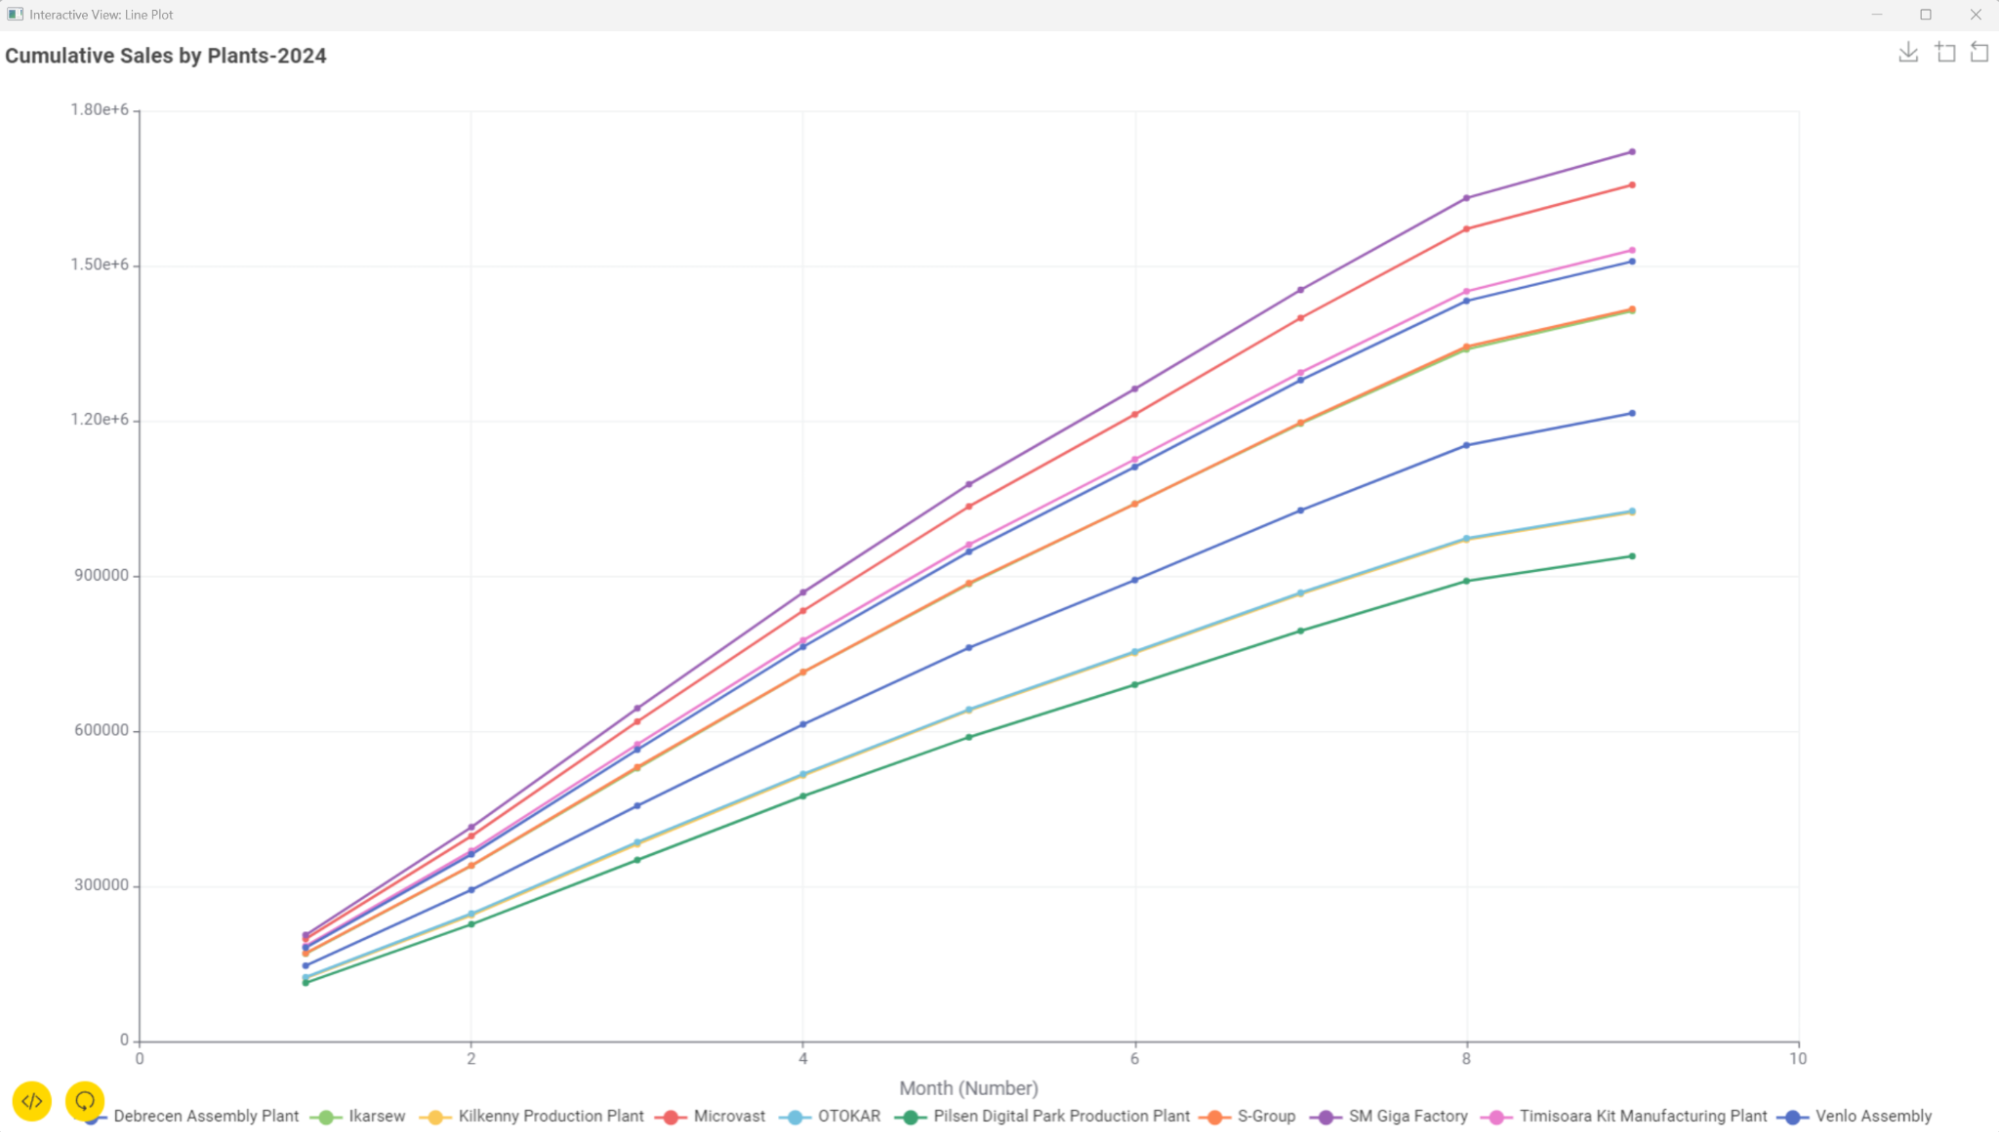
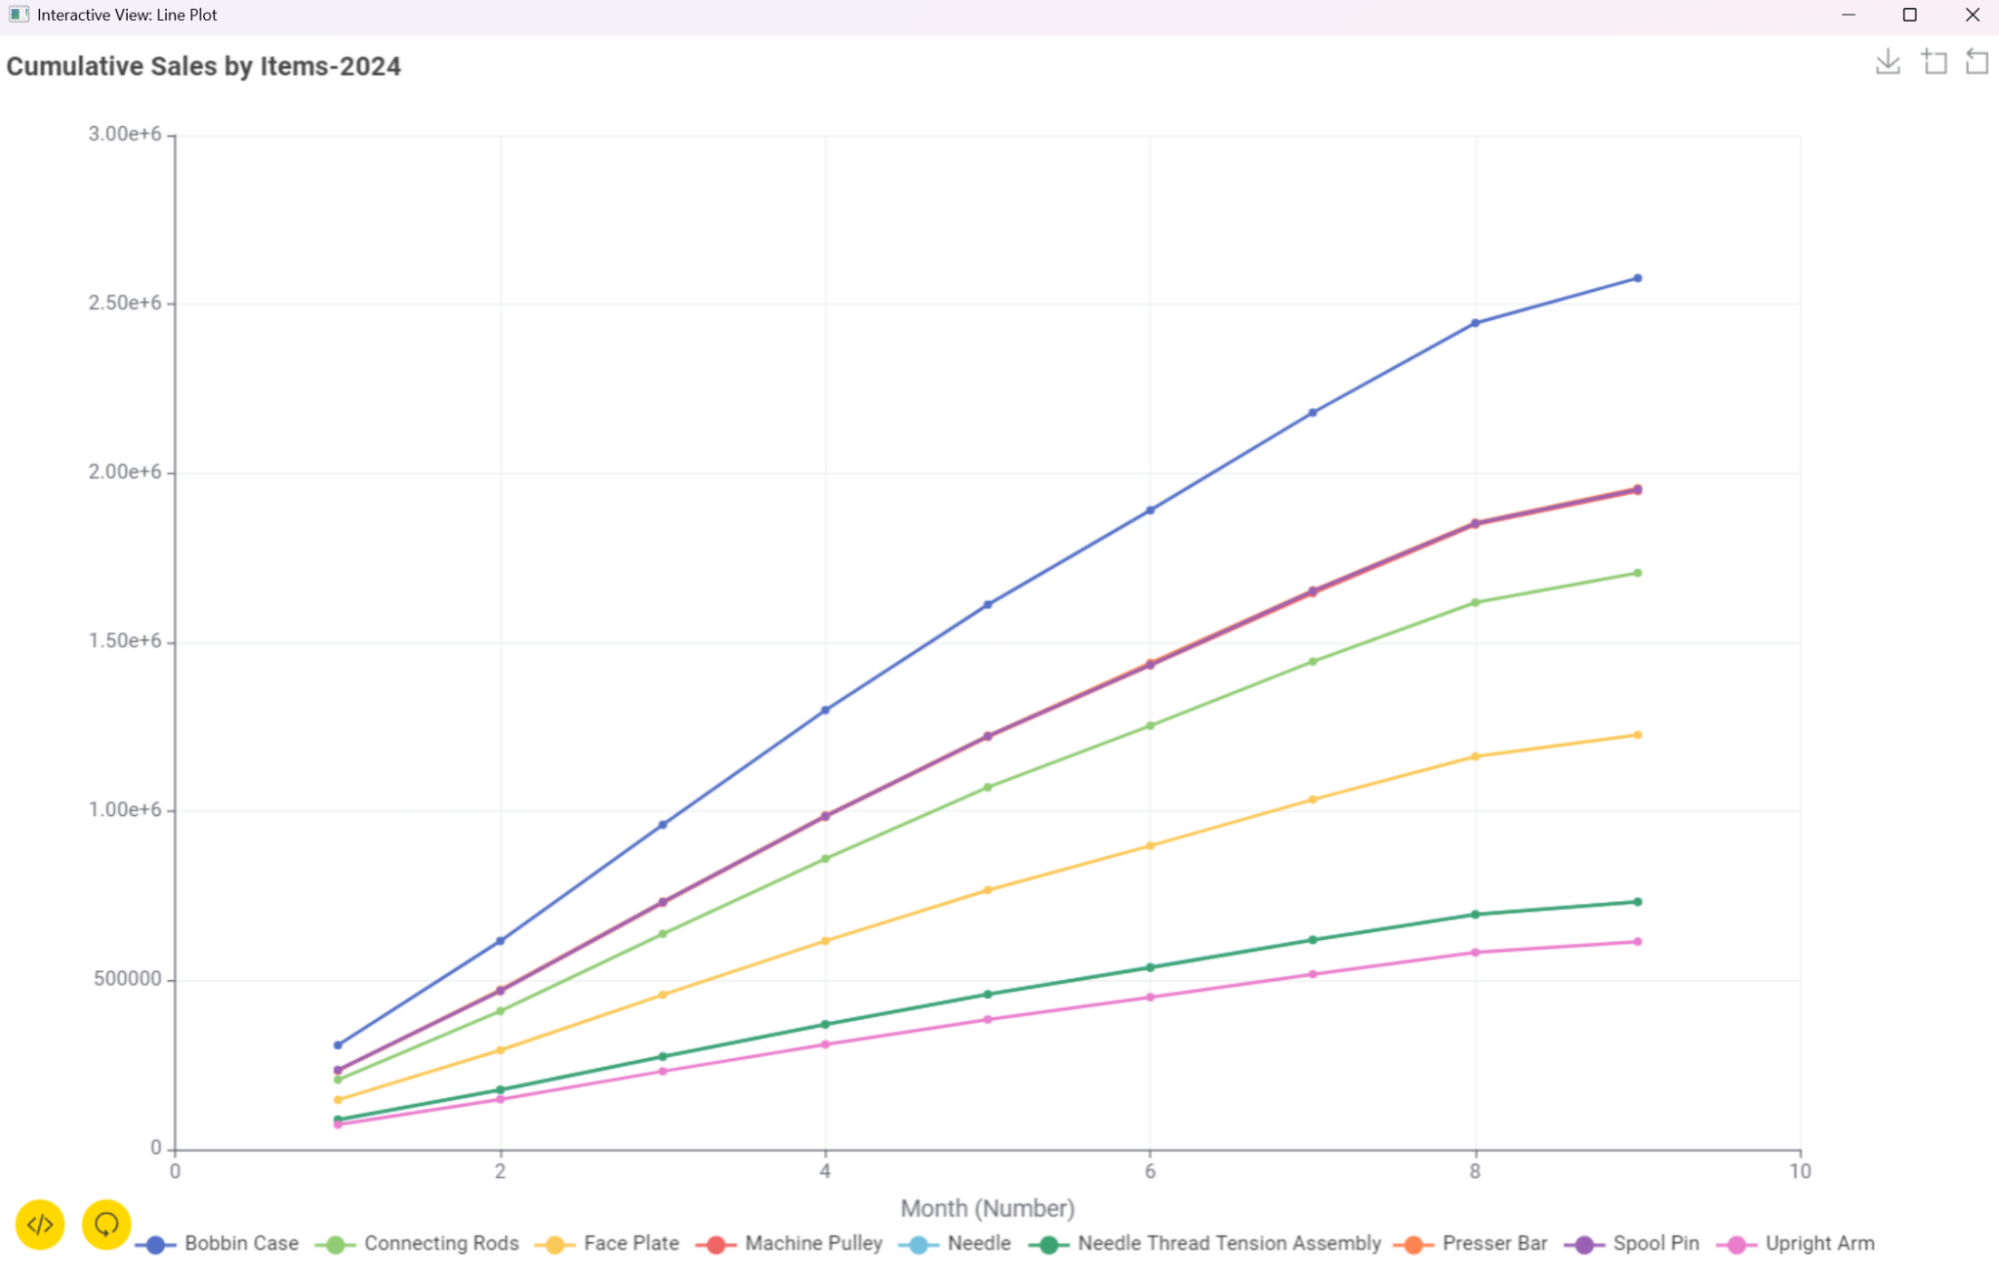
Here, we show sales trends by cumulative sales for items and cumulative sales by manufacturing plants for 2024.
We wrap the data manipulation nodes inside a metanode and name it “PreProc” as we use it to pre-process the data, and we can also reuse it in the future. The below snapshot shows the nodes inside the metanode.
Step 3: Visualization and report creation
We want to visualize the monthly sales trends by manufacturing plants and items – as you can see below.
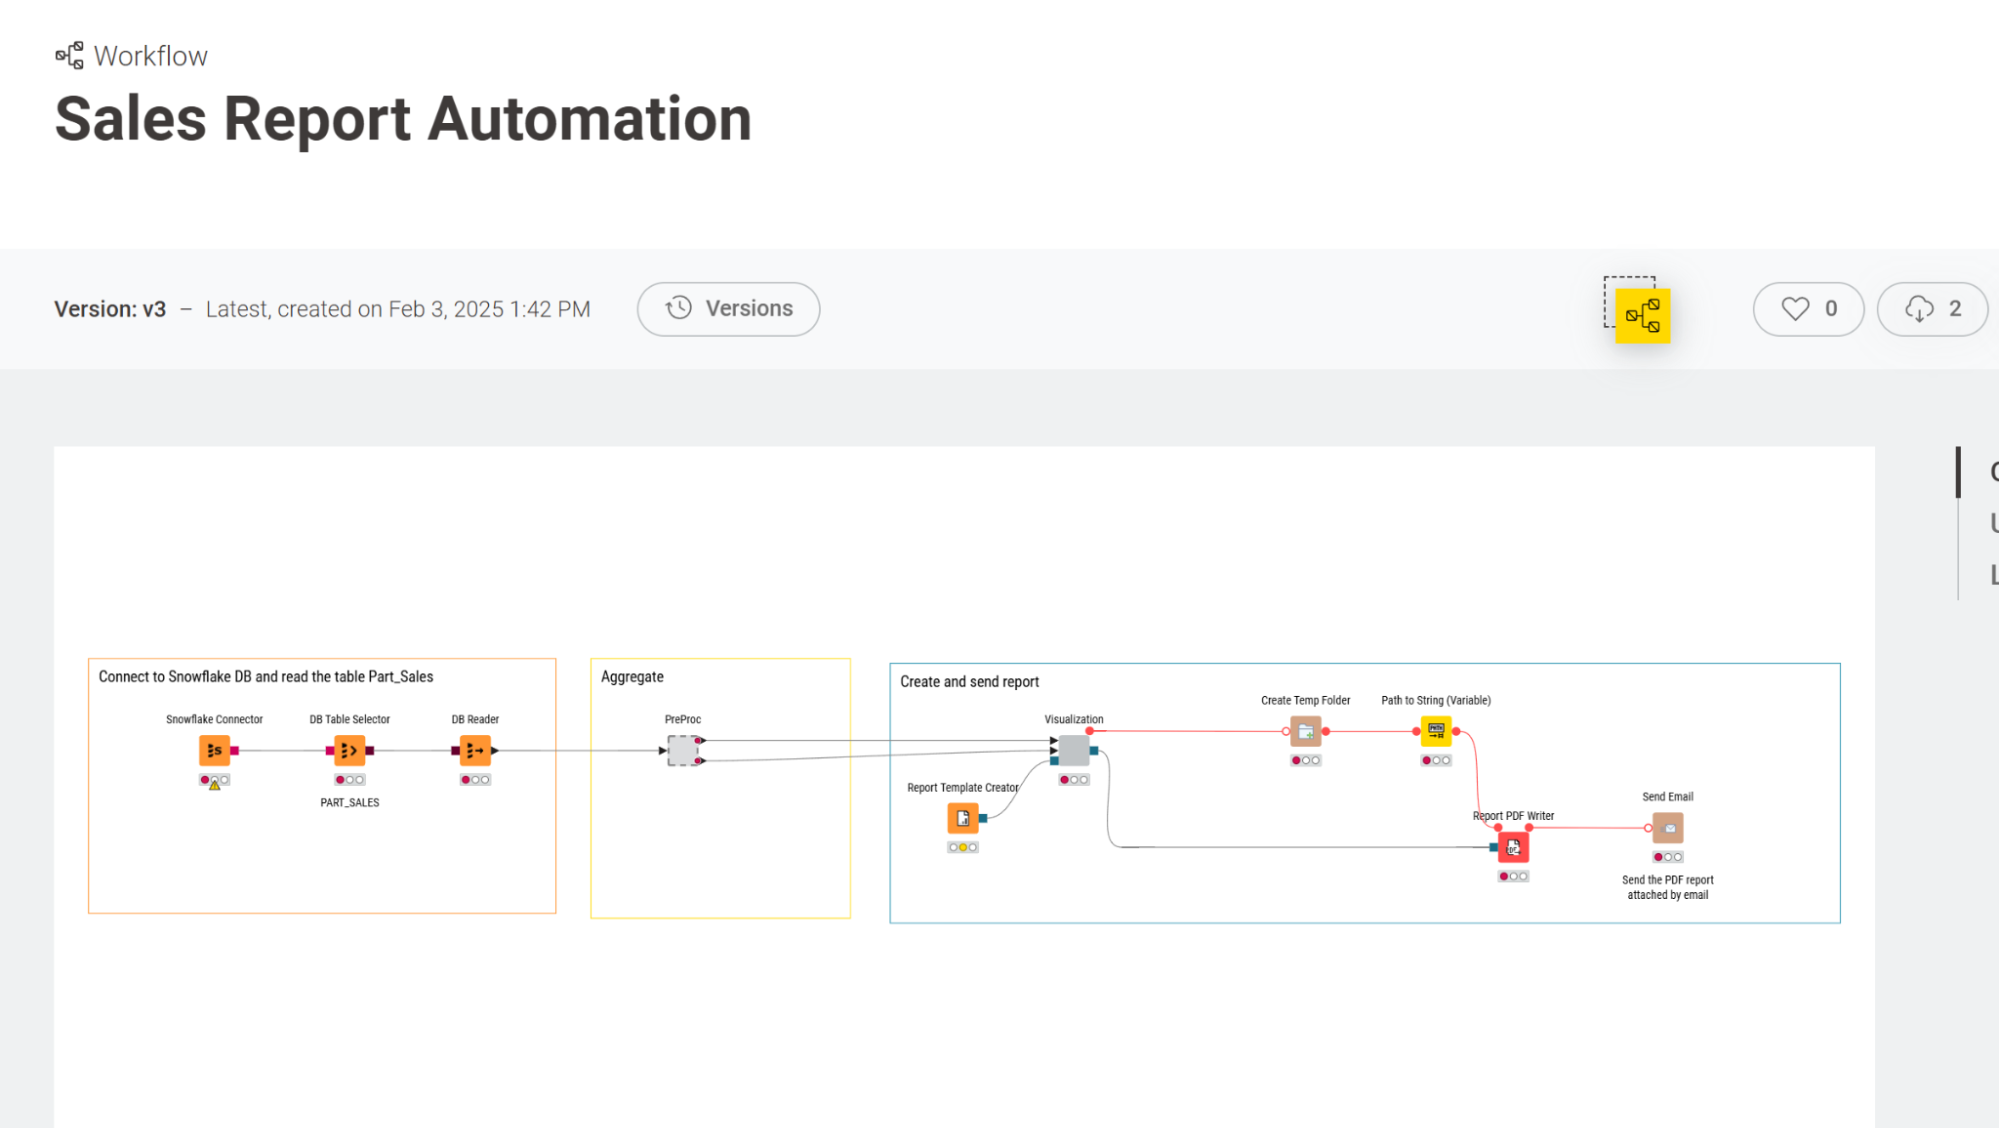
Finally, we wrap these visualizations into two components and generate a PDF report using the KNIME Reporting Extension. Refer to this blog to help you get started with th KNIME Reporting extension.

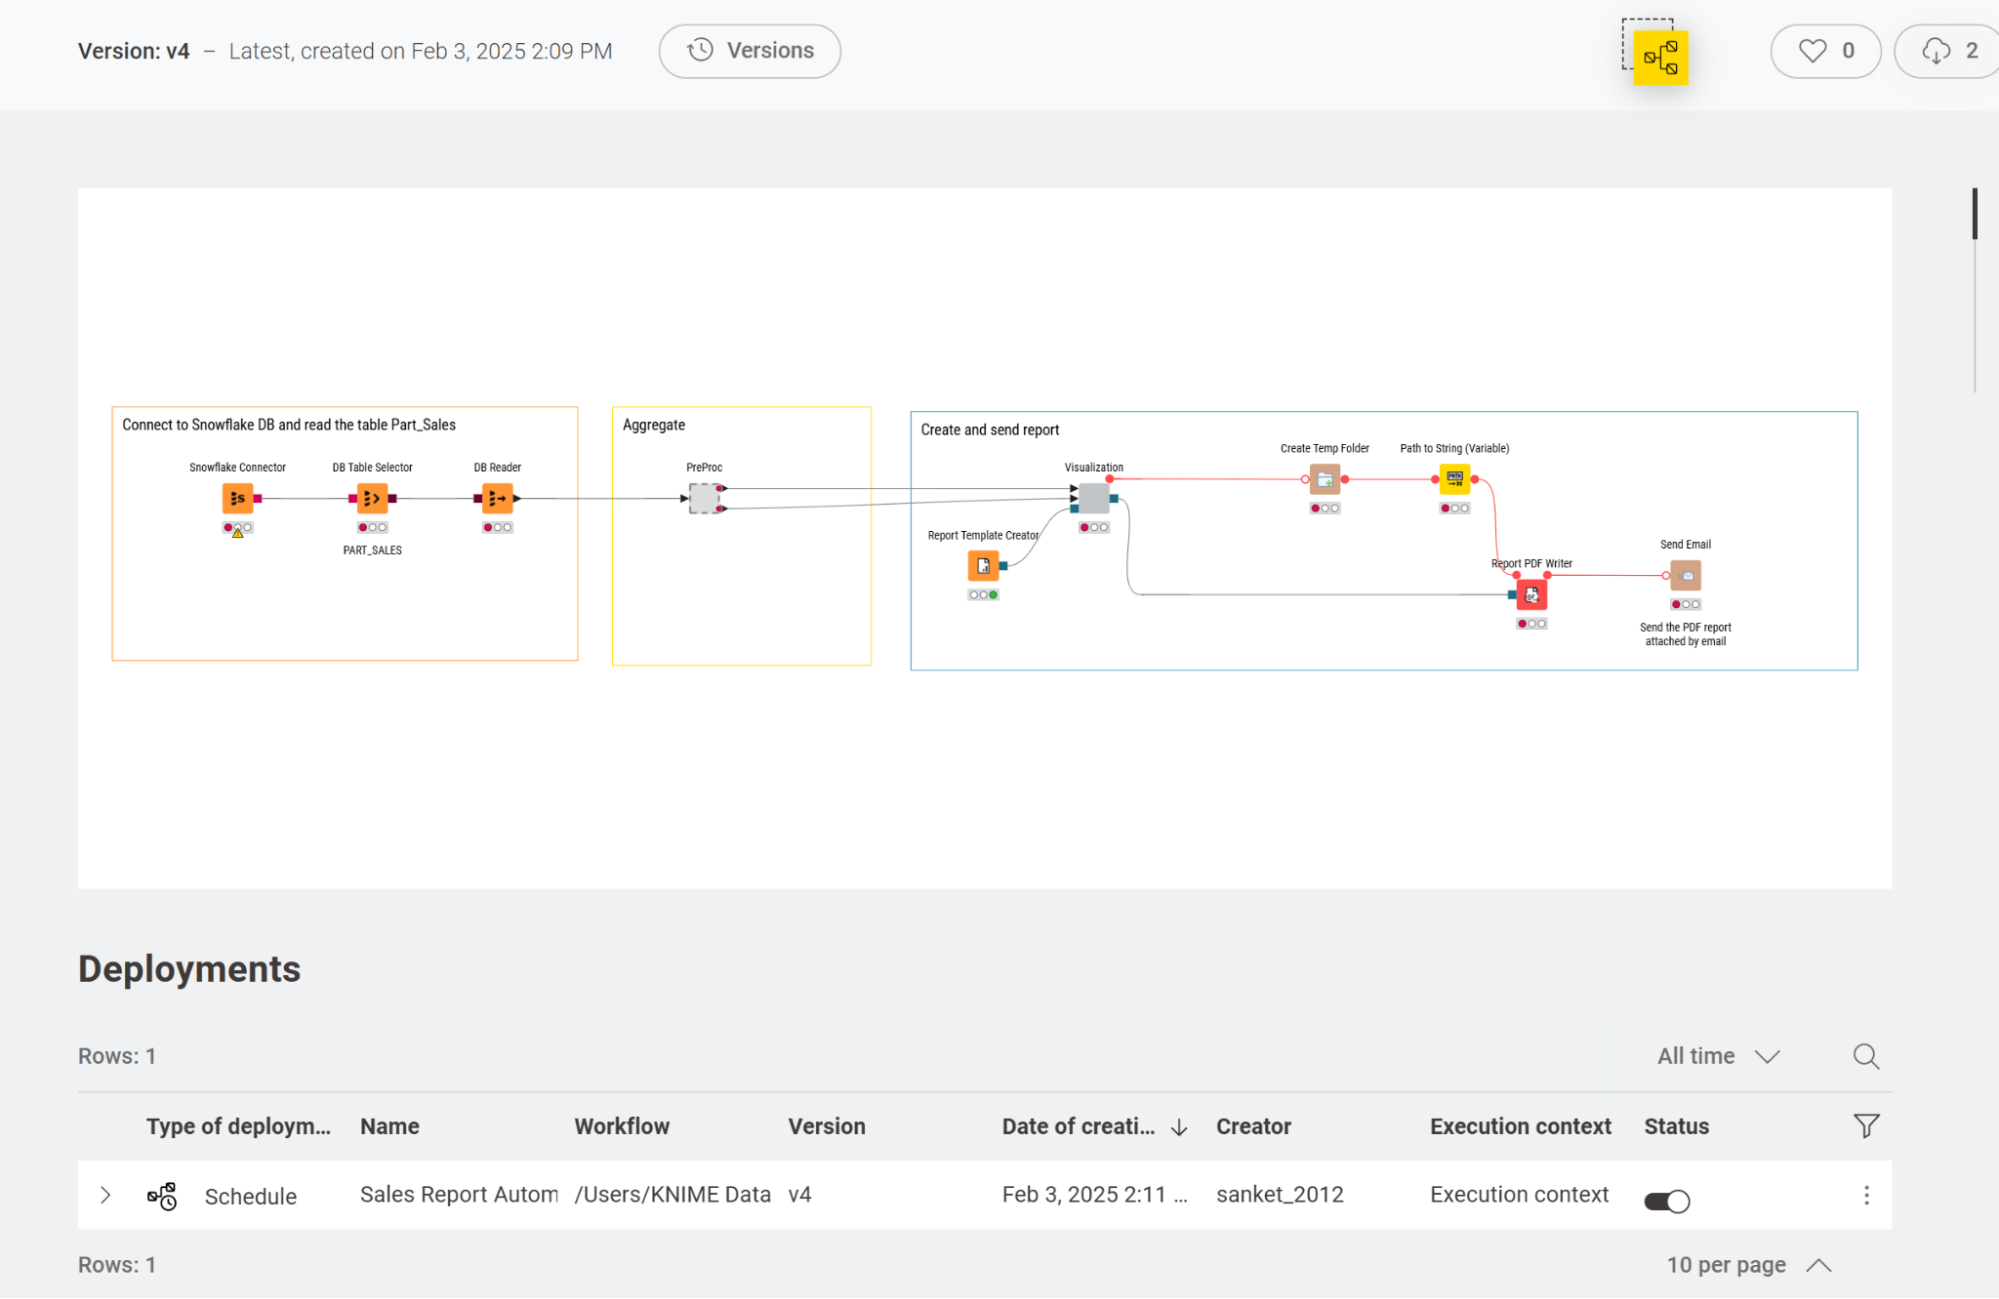
Our final workflow is in the snapshot below. Now we are ready to schedule it. To do that, we’re going to use the KNIME Team Plan.
Step 4: Automation through scheduling on KNIME Team plan
Scheduling is one of the most powerful features that comes with KNIME Team plan, and for our use case, we want to schedule the workflow to run every last day of the month.
Once we upload the workflow to a particular space on our team, the first thing we want to do is to version the workflow. Versioning is especially important when you want to collaborate and share workflows with your team.
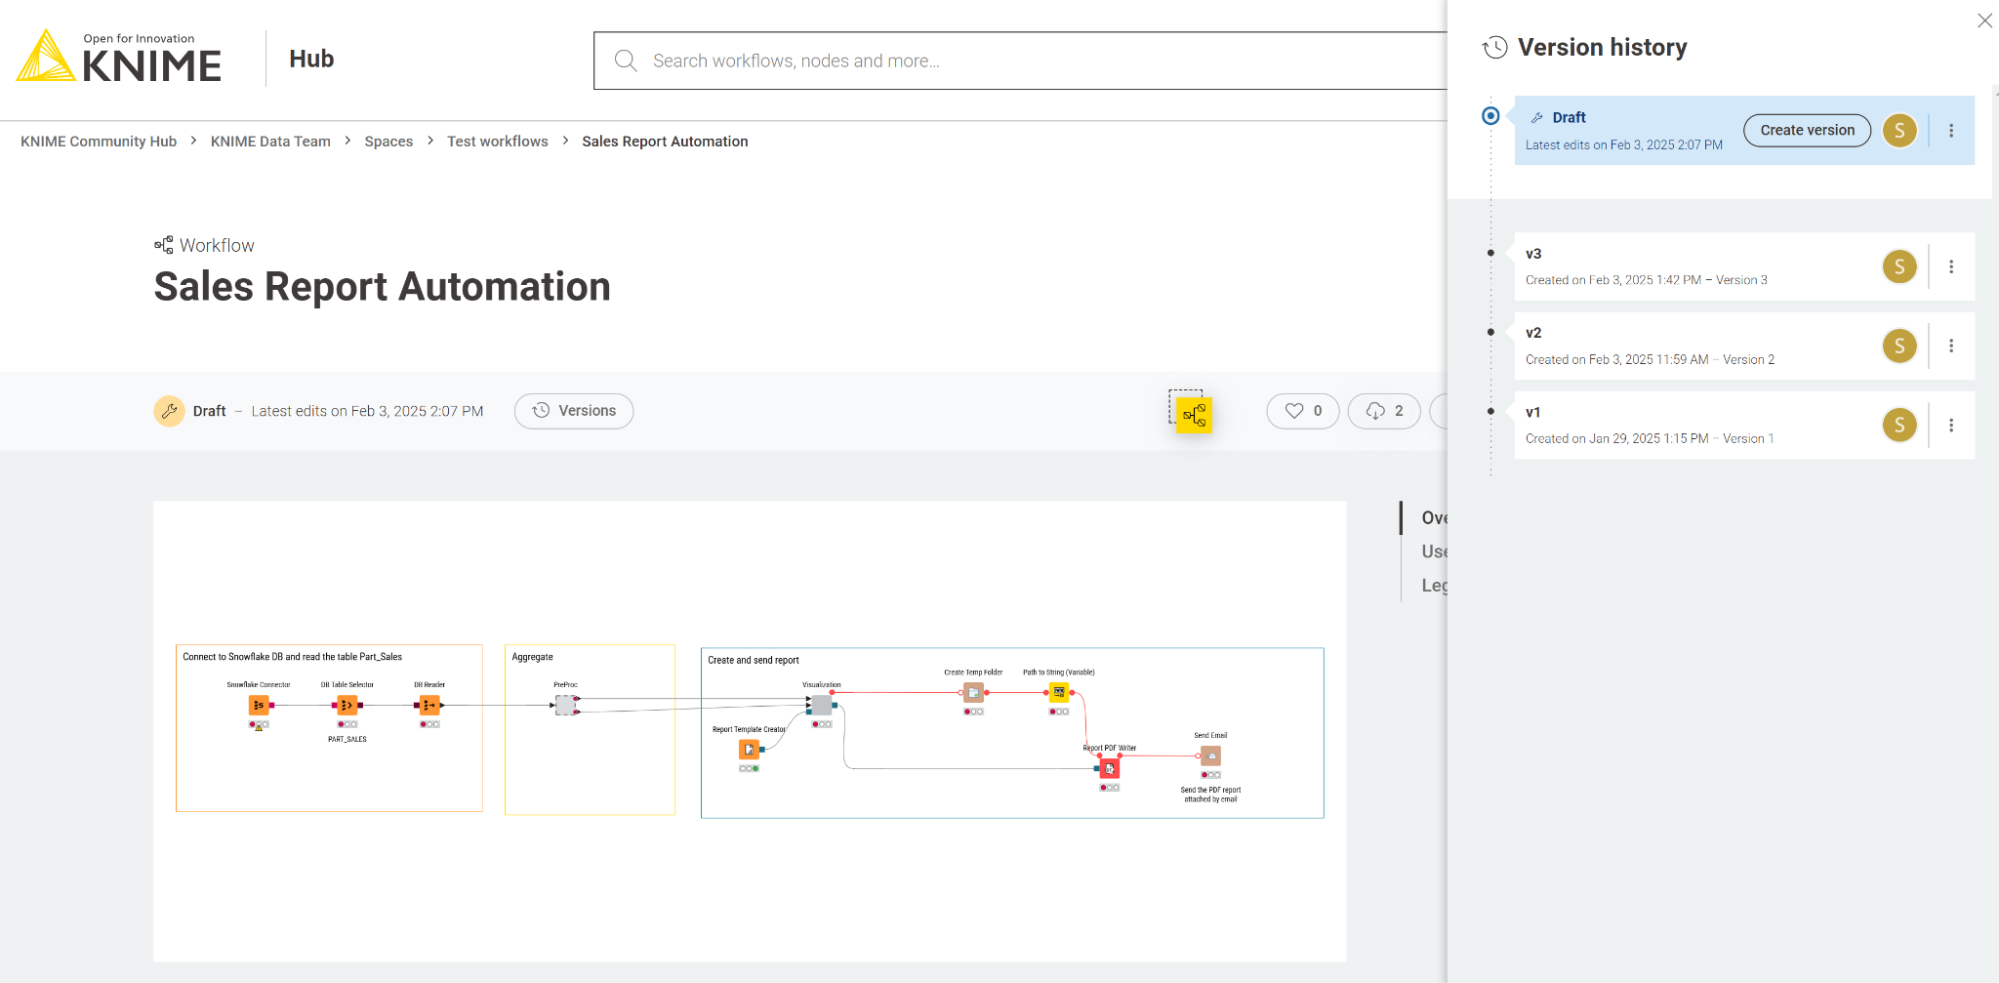
Click on the Versions > Create Version > Click OK.
Once the workflow is versioned, you can run it with ad-hoc execution and double-check if it runs fine, or you can deploy it. Since we want to schedule the workflow, we will click the Deploy option and create a schedule.
'

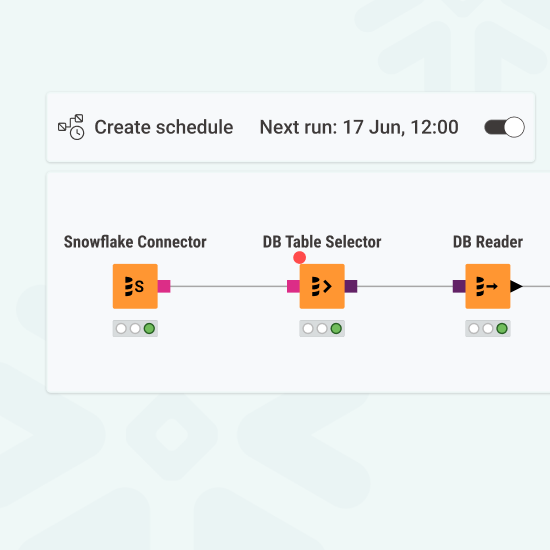
Deploy > Create schedule will open a window on the right-hand side of your screen, as shown in the snapshot below.
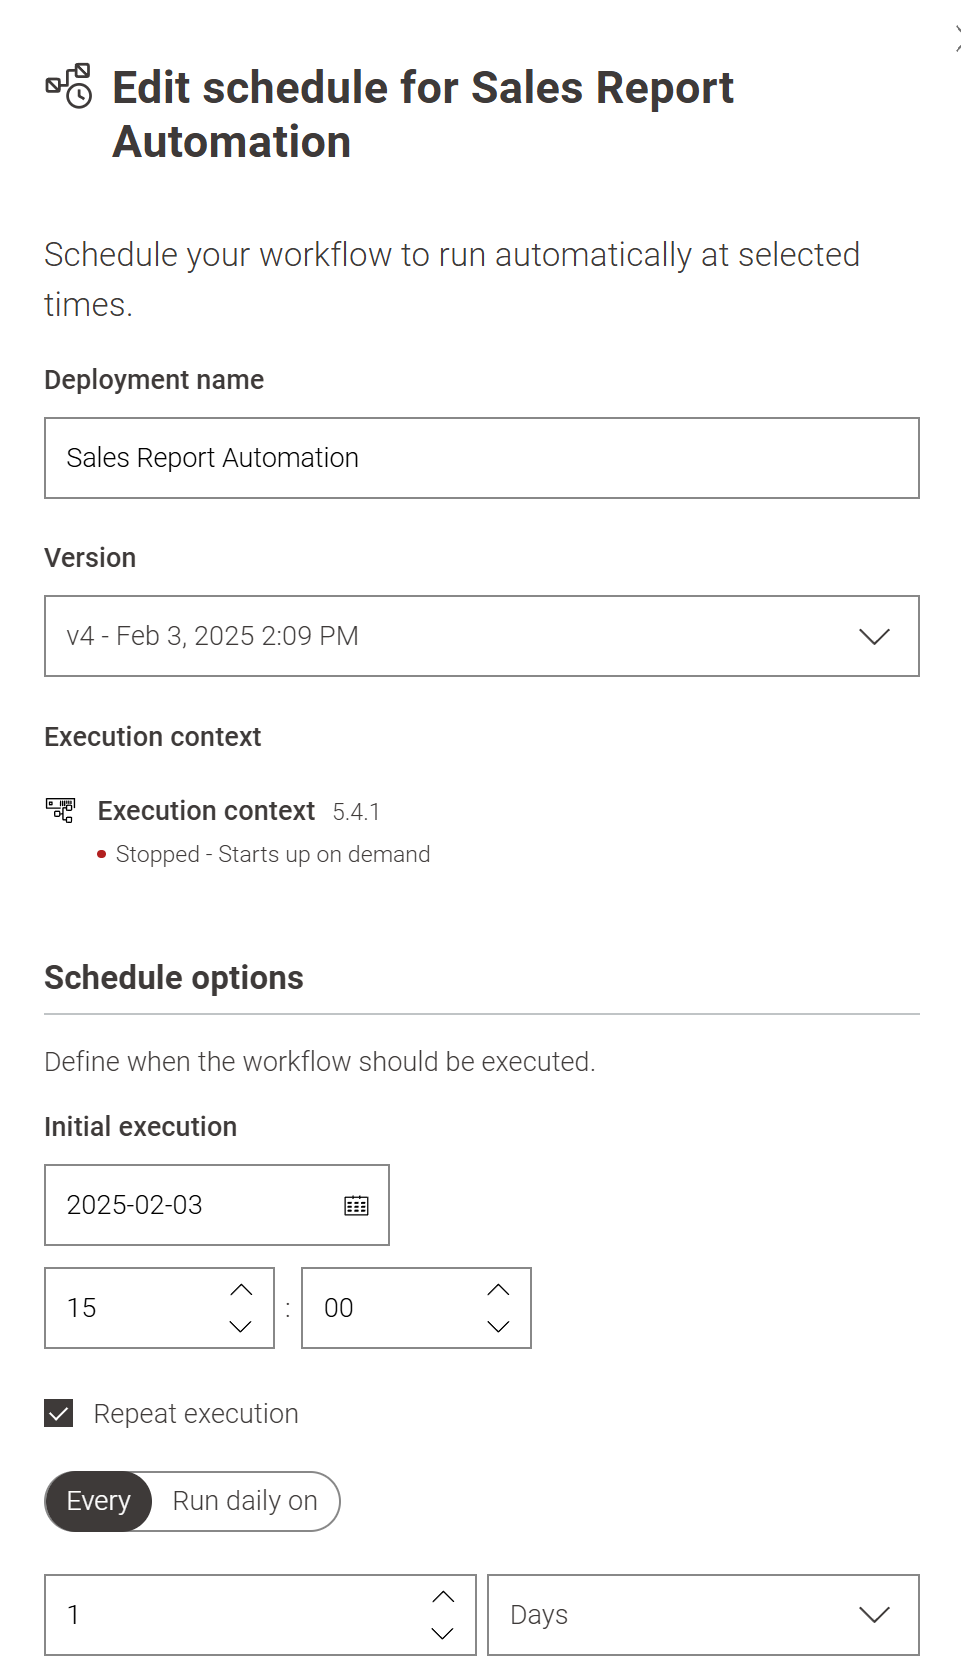
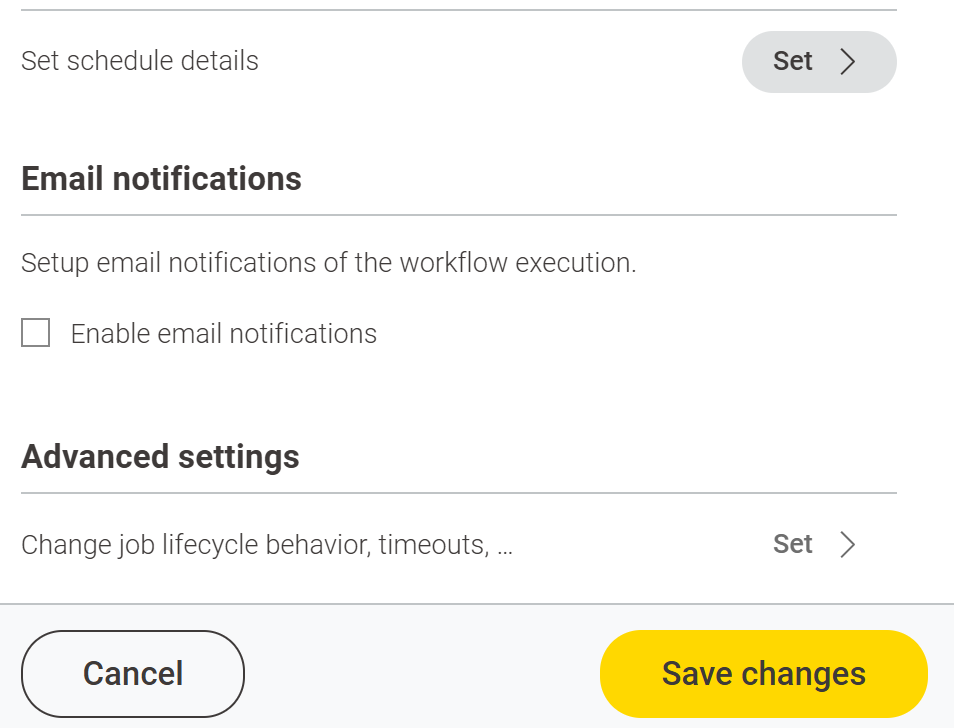
We want our workflow to run on the last day of the month. Click the “Set Schedule details” option in the same panel to set this.
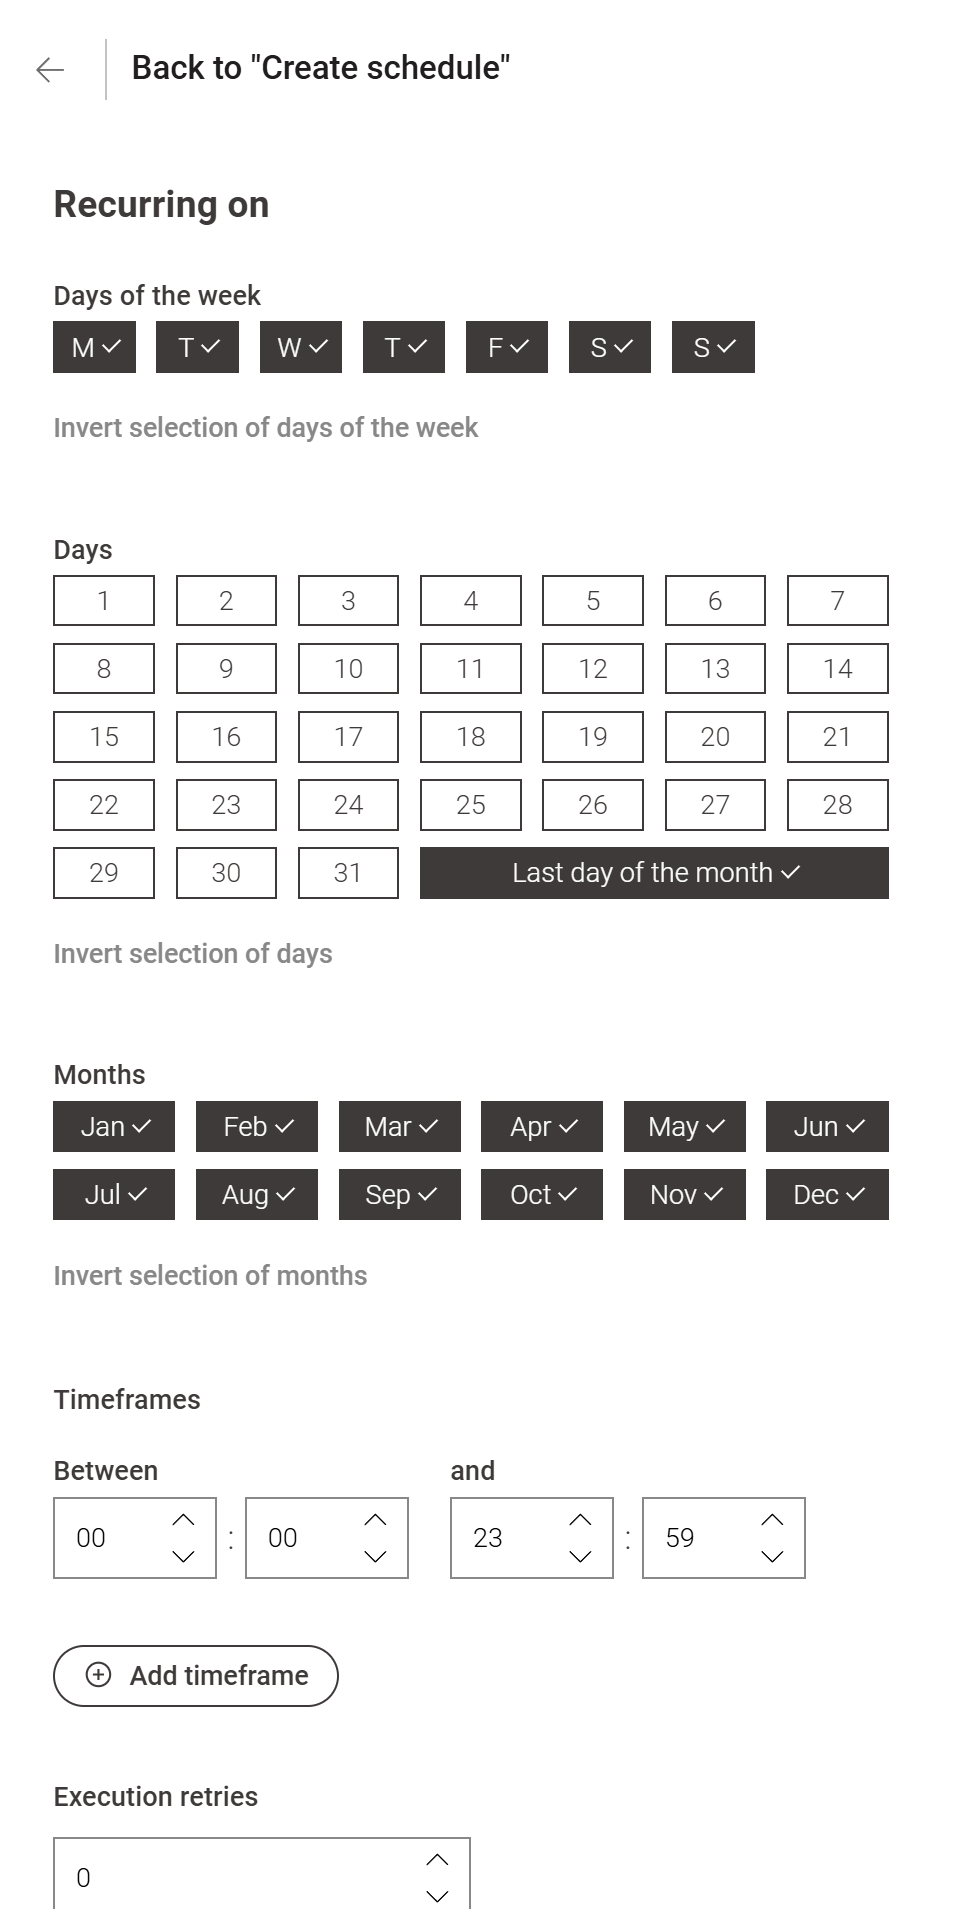
Clicking “Set Schedule” will open another window with more advanced and granular options like days of the week, days of the month, etc., on which you want your workflow to run.
After creating the deployment, you can see below the workflow that a deployment has been designed with its type as “schedule.” This deployment can be edited, and multiple such deployments can be created.
Automate sales reporting with a KNIME Team plan
This is how we have automated the sales reporting using the KNIME Team plan. With this streamlined workflow, you can send accurate and timely reports and scale the workflow per your use case requirement. Here is a detailed guide to help you automate your first workflow.