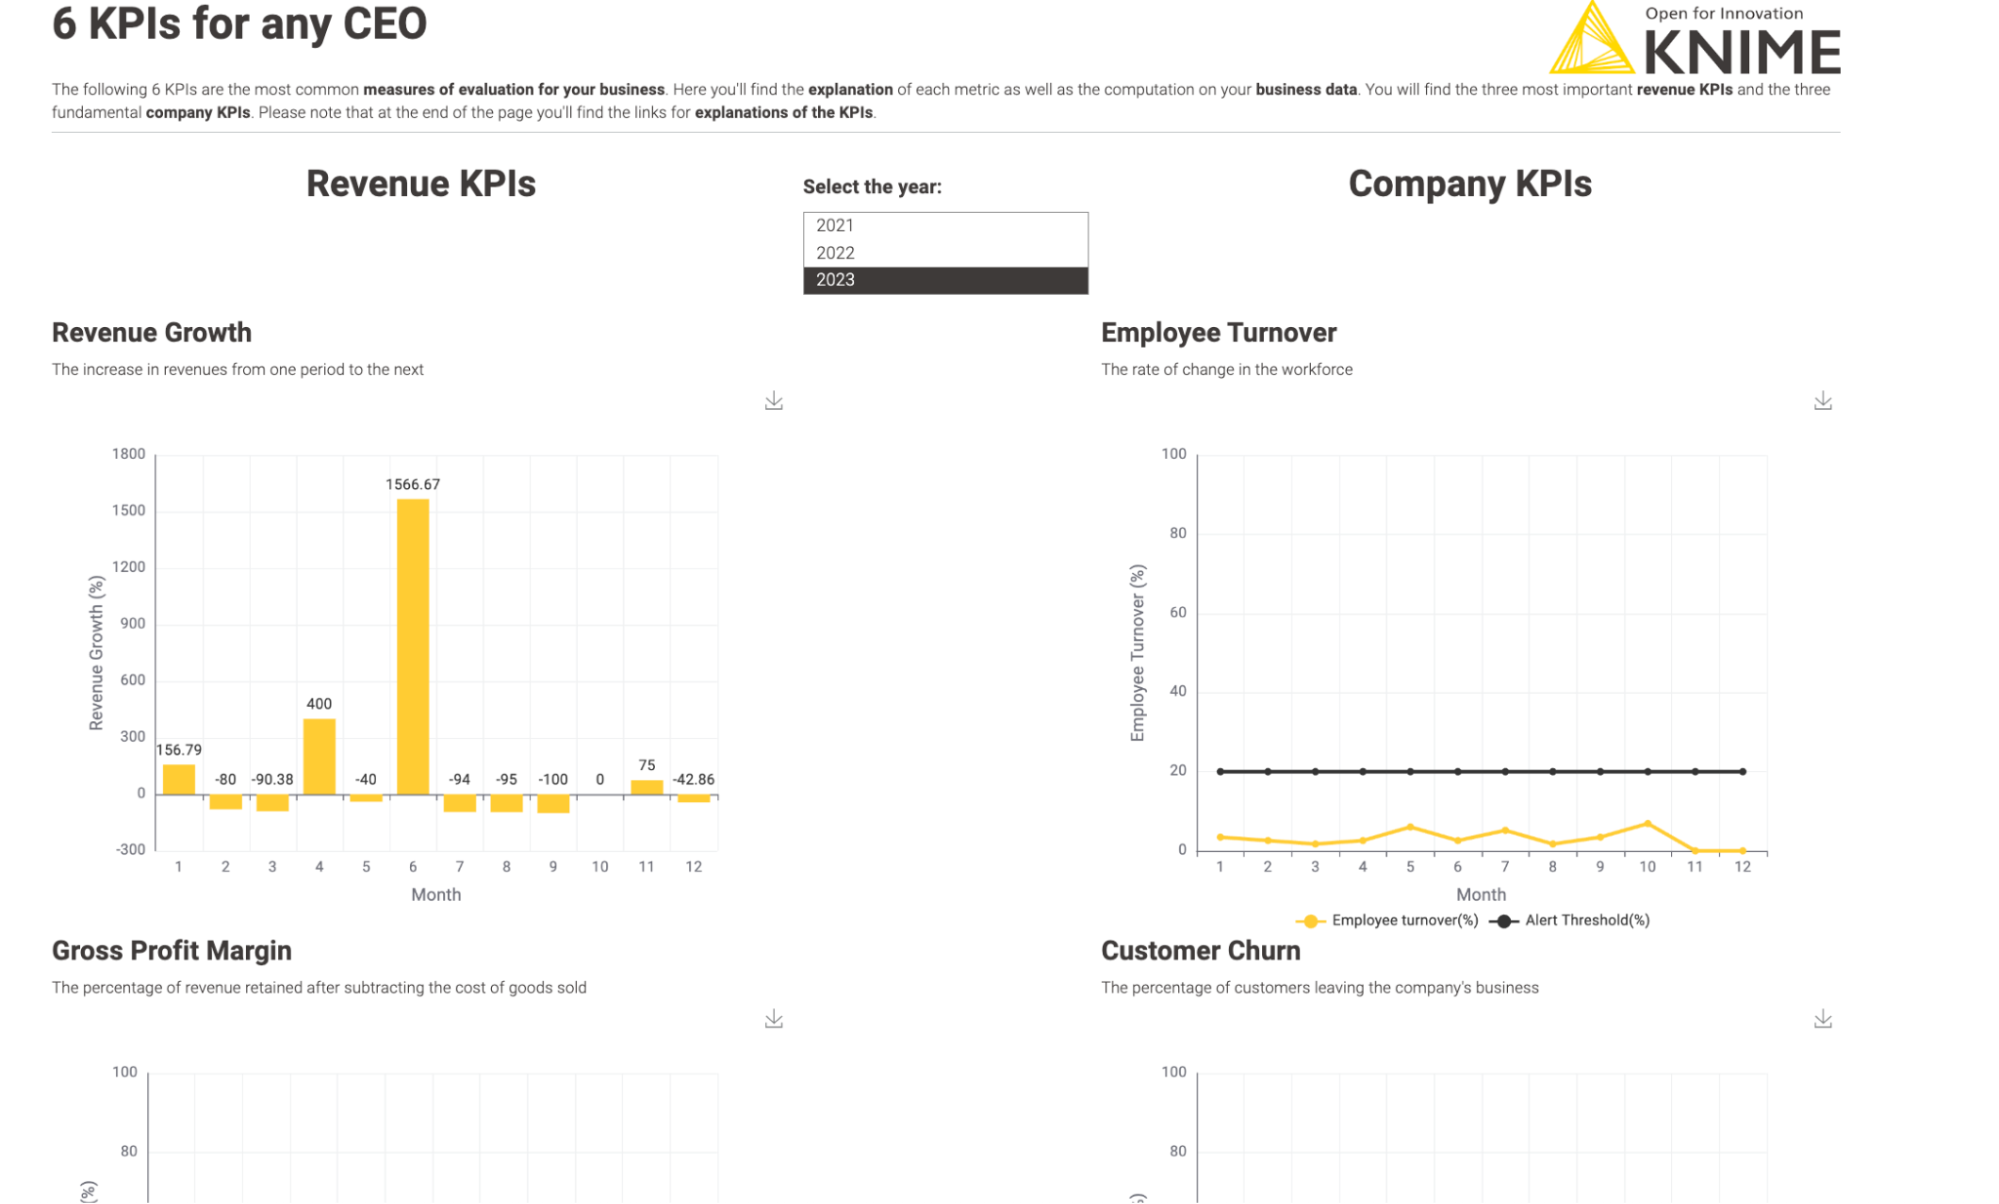
KNIME data apps are interactive data interfaces where you can create anything from data visualization dashboards all the way through to creating interactive web applications for data entry.
Now you can share data apps with your team from within your internet browser if you have a KNIME Team plan subscription. With the KNIME Team plan, deploying and running a data app, then sharing it with relevant people in your organization, is quick and easy.
Let’s take a look at how to deploy and share your data app with a Team plan subscription:
1. Build your KNIME workflow
You can’t deploy a data app until you’ve built it. So the first step is to build your workflow, including the elements needed to output as a data app. You’ll want to ensure your workflow built in KNIME Analytics Platform is set to output as a data app by including widget and visualization nodes wrapped into components. You’ll also want to finalize the formatting of your data app before uploading it. You can learn more about how to build and format your first data app in our beginners guide to building data apps.
2. Upload your workflow to your private space
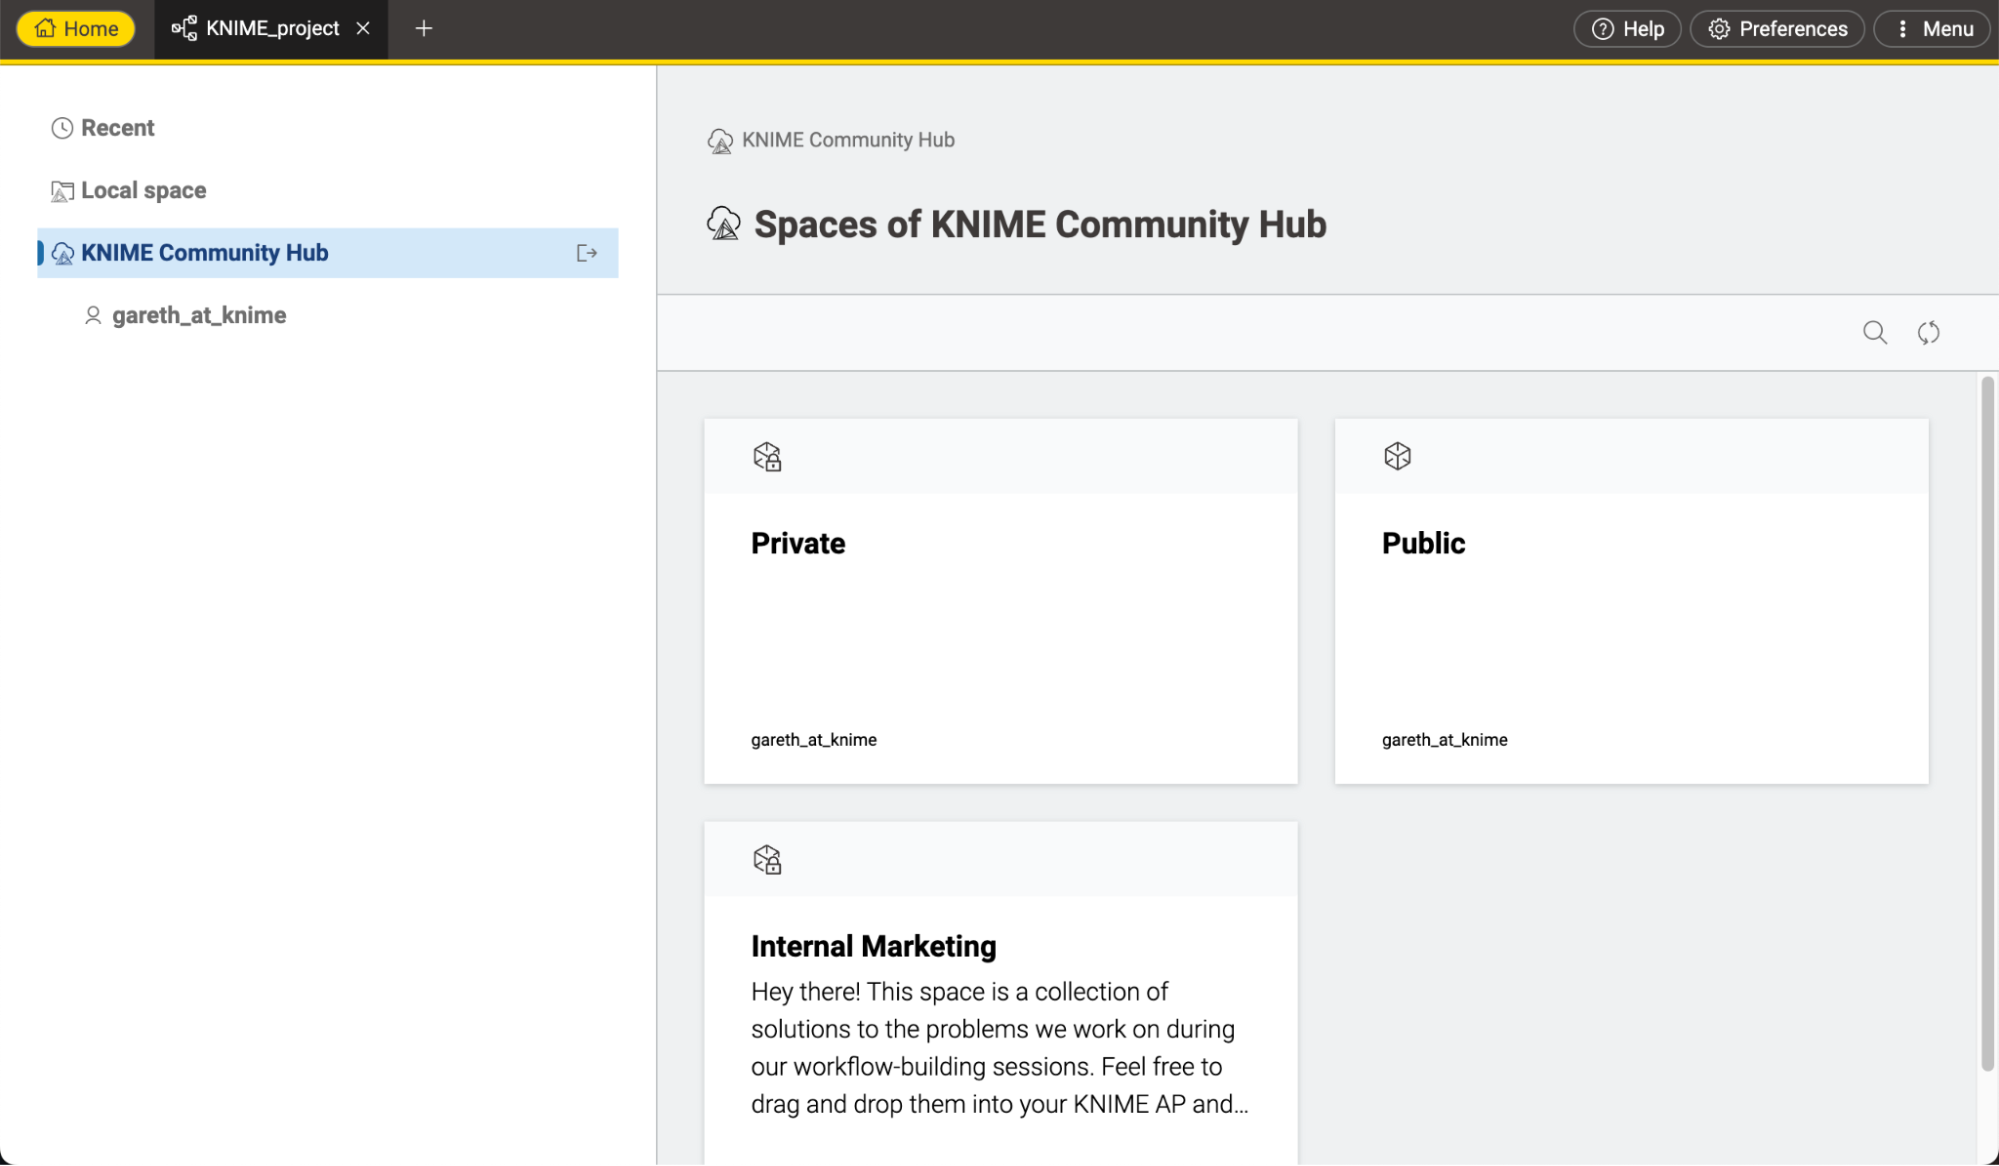
Upload your workflow to the community hub in your private team space. In your private team space only you and team members you invite can view and edit the workflow. Your workflow needs to be in your private space before you can deploy and run it.
Private spaces where you can share and execute on the KNIME Community Hub are available with a KNIME Team plan subscription. You can start a 30-day free trial at any time.
3. Select your workflow and open it
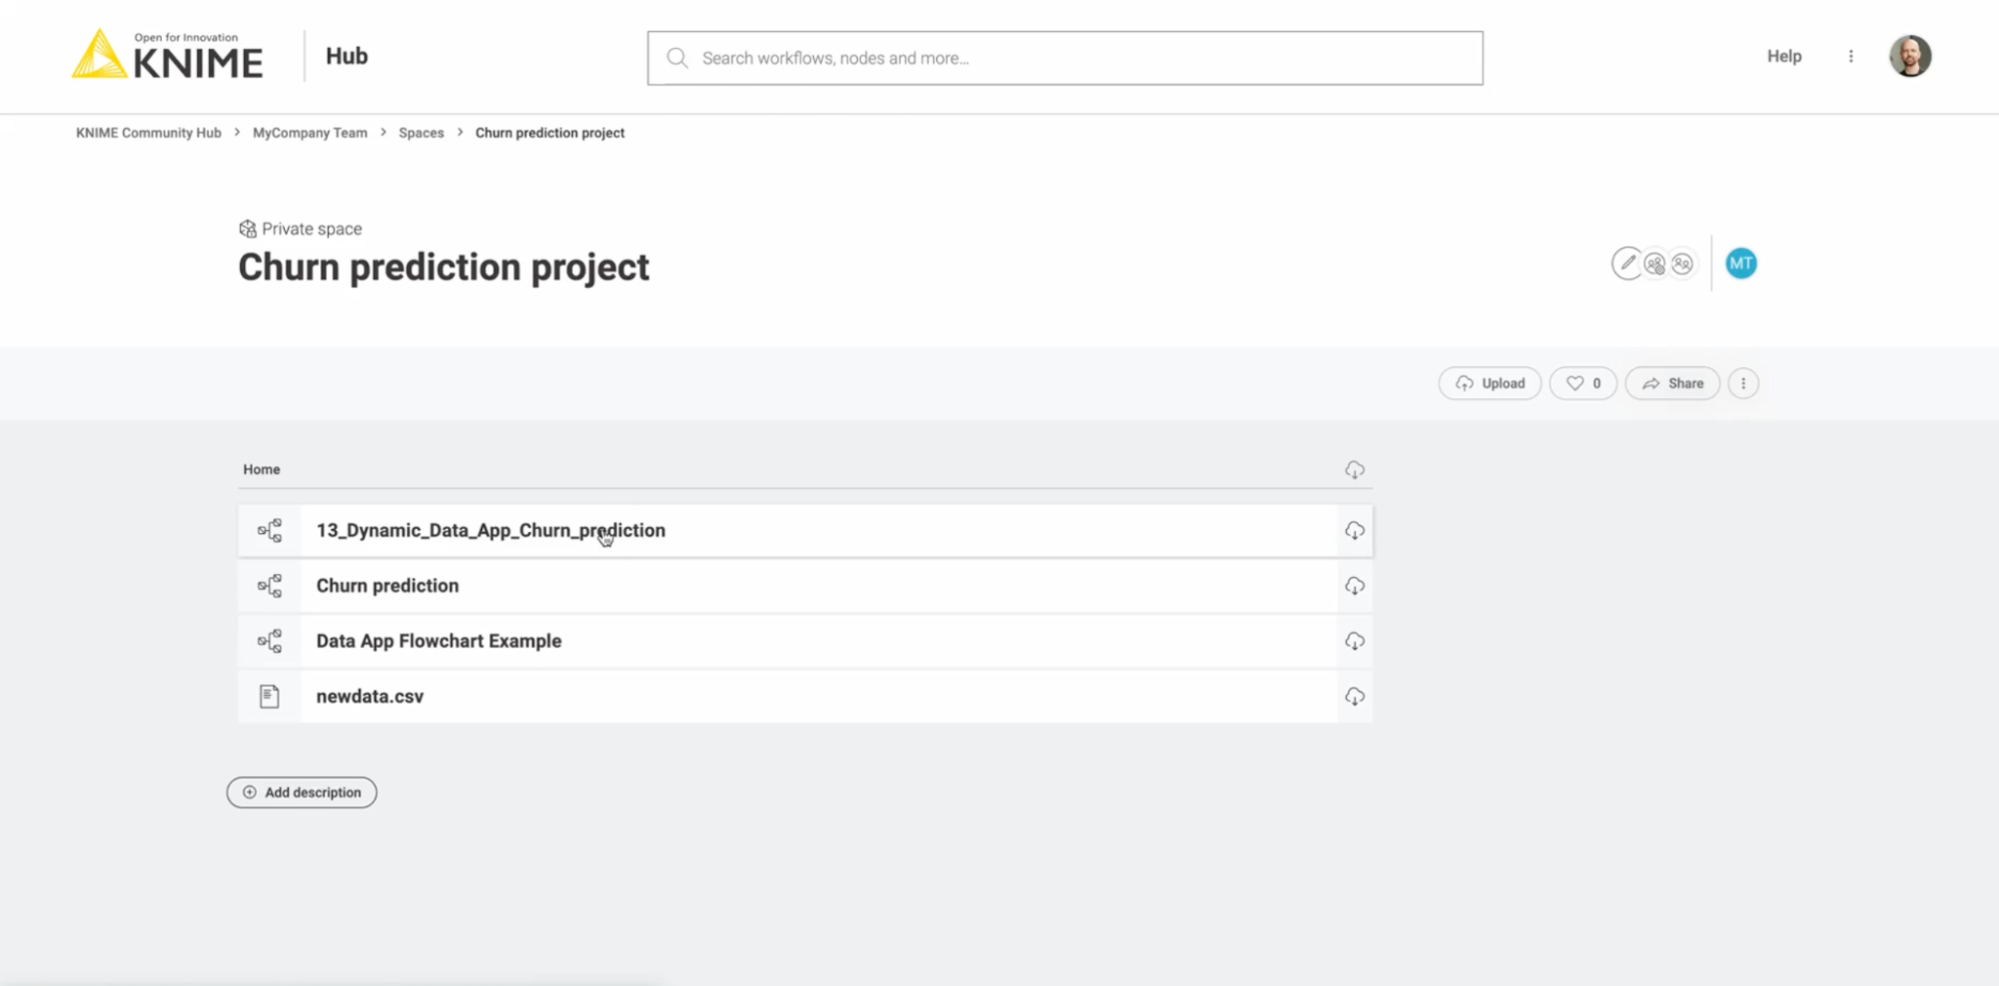
Under the “home” section you’ll see a list of the workflows you have uploaded to your private space. Simply click into the workflow you want to deploy and a new window will open showing your workflow.
4. Click “run” to check your data app is working and then deploy it
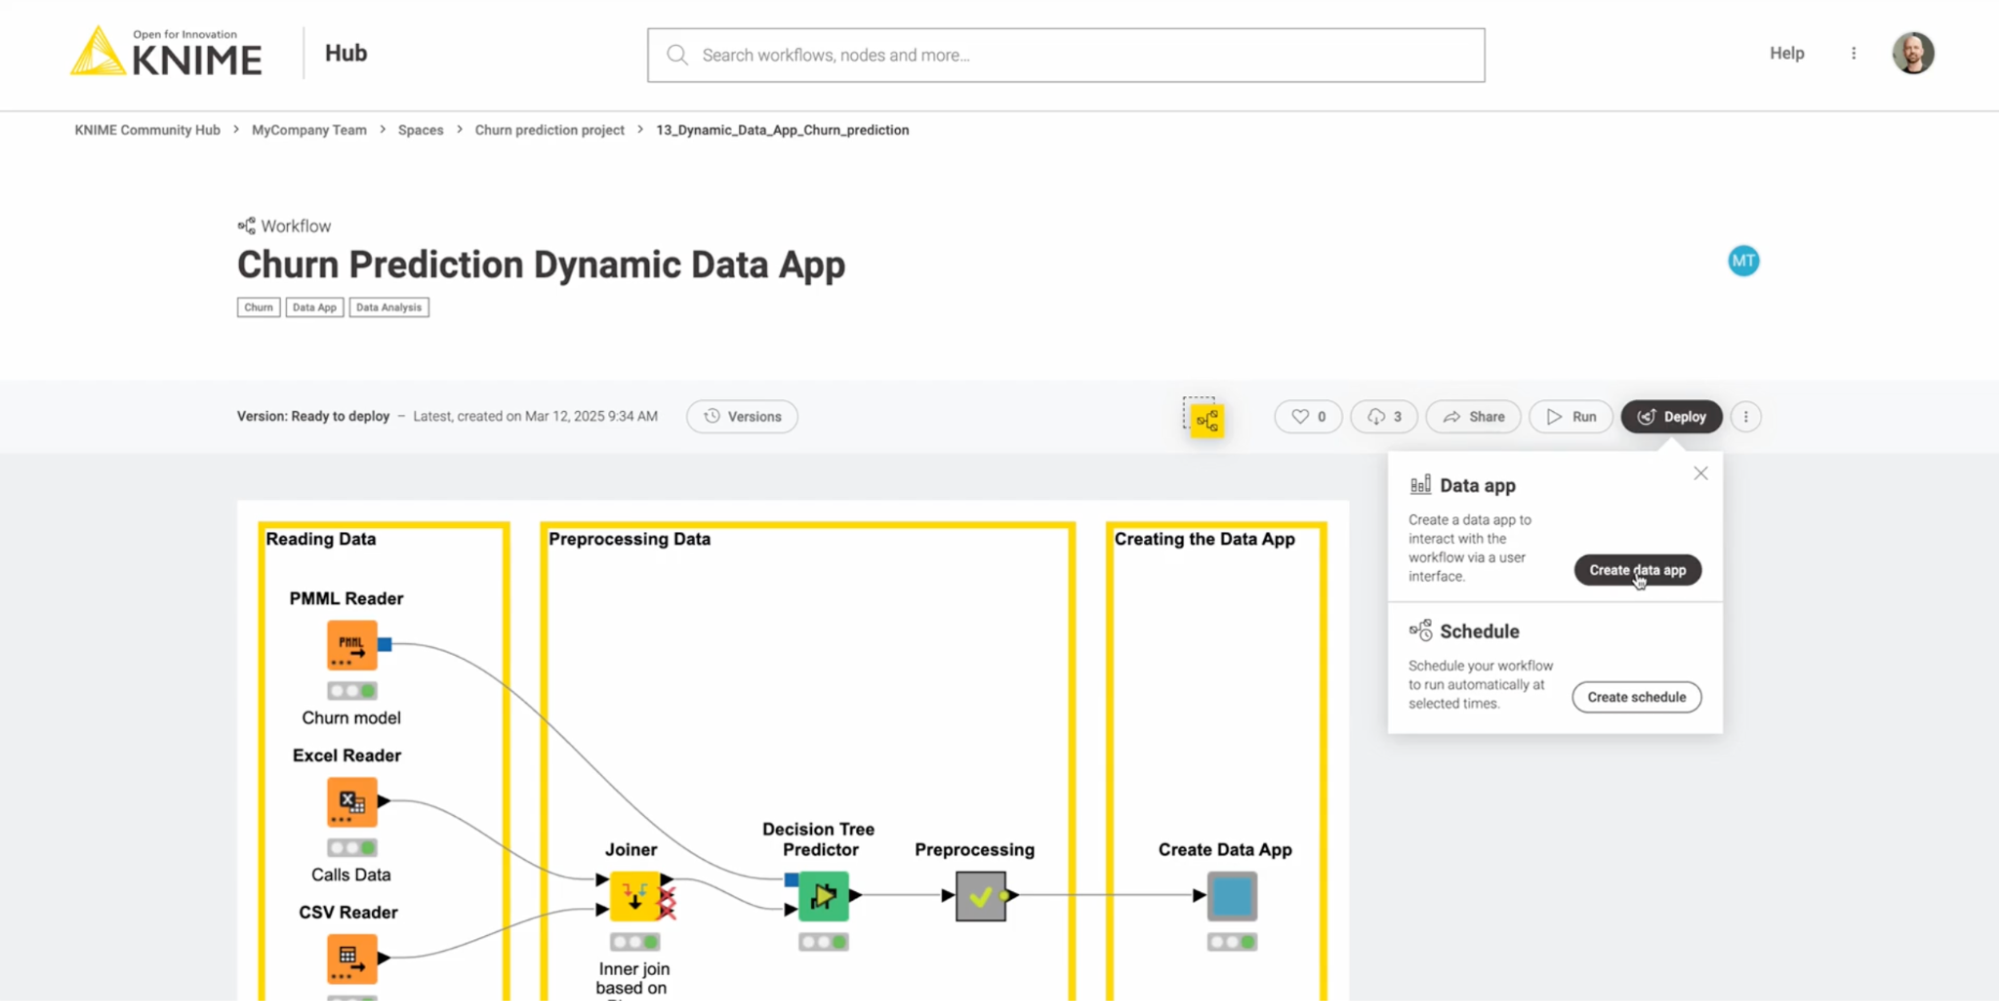
You’ll now be able to see a preview of your workflow. Click the run button to check it’s working as expected.
If everything looks good, you can deploy your data app by clicking the deploy button on the top right and then clicking “create data app”.
In case you realize your workflow needs some extra finishing touches, you can edit the workflow via your KNIME Analytics Platform before deploying it. From the home screen of the KNIME Analytics Platform you will be able to click into your private space and access your workflow, assuming you are logged into KNIME Community Hub.
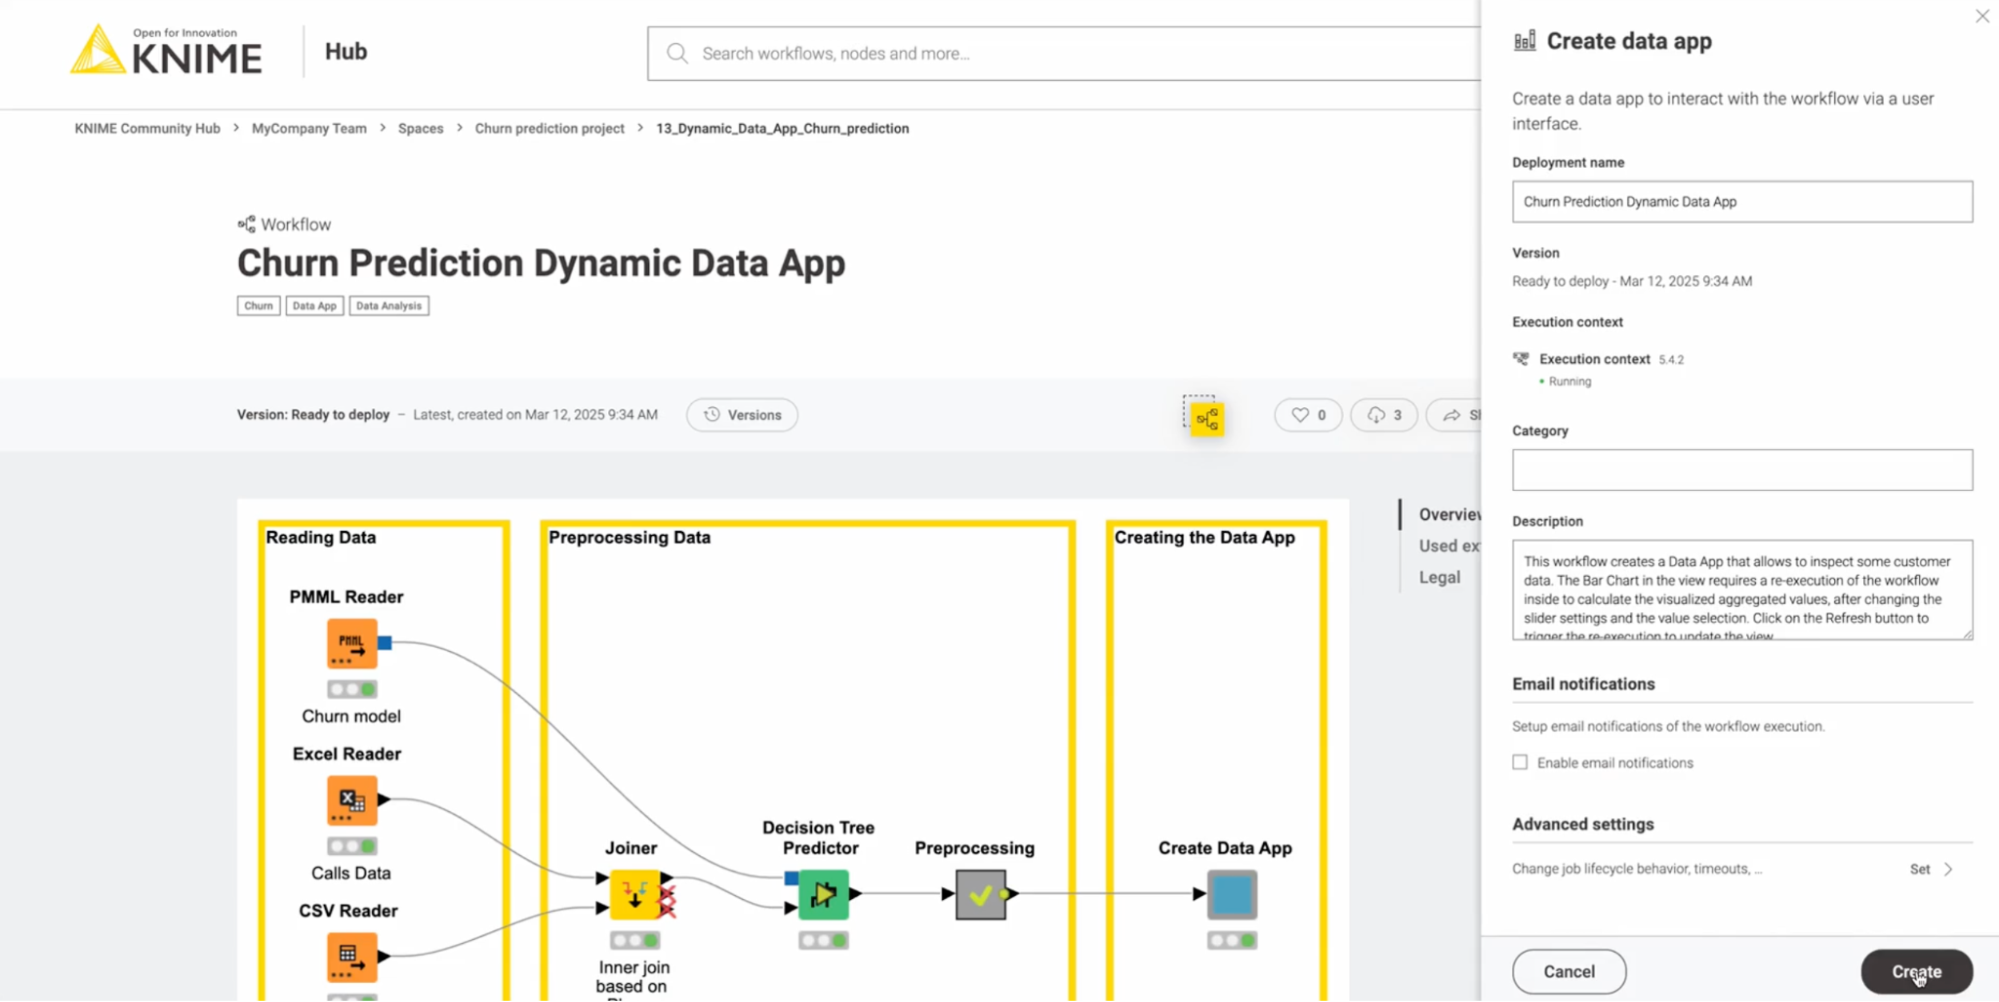
5. Confirm the details in the side panel and click “create”
After clicking the “create data app” button you have a chance to review some of the details, including setting the deployment name, description, and any advanced settings concerning how the job is run on the cloud. If everything looks good, confirm by clicking “create”.
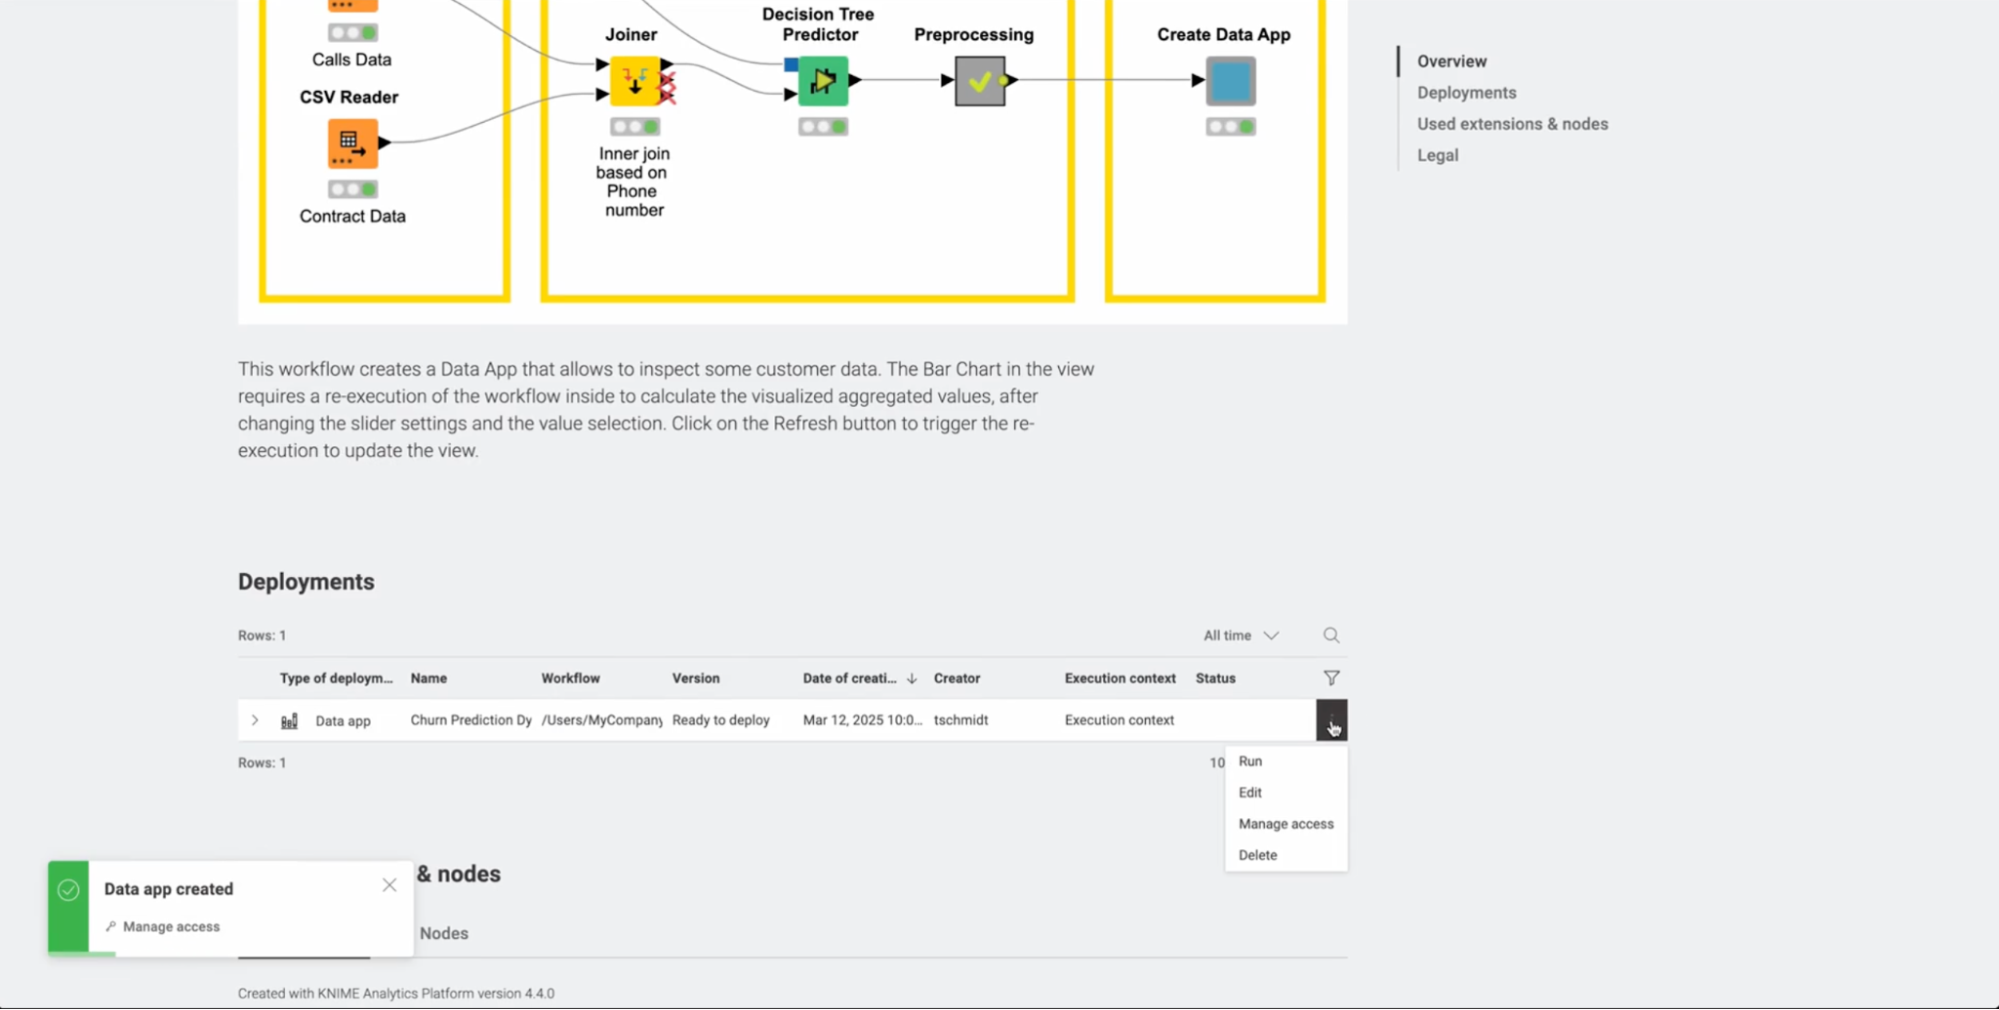
6. Check your data app is deployed successfully
Now your data app is deployed and can be used by other team members or people in your organization. Scroll down to the deployments section and you should see the details of the data app you just deployed. If you don’t see anything, scroll back up and re-attempt the deployment.
7. Share your data app with others
If you’re deploying and running a data app you probably want to share it with team members. Good news, you can invite your KNIME team members or anyone else with a KNIME Hub account to consume and use the end data app product you’ve built.
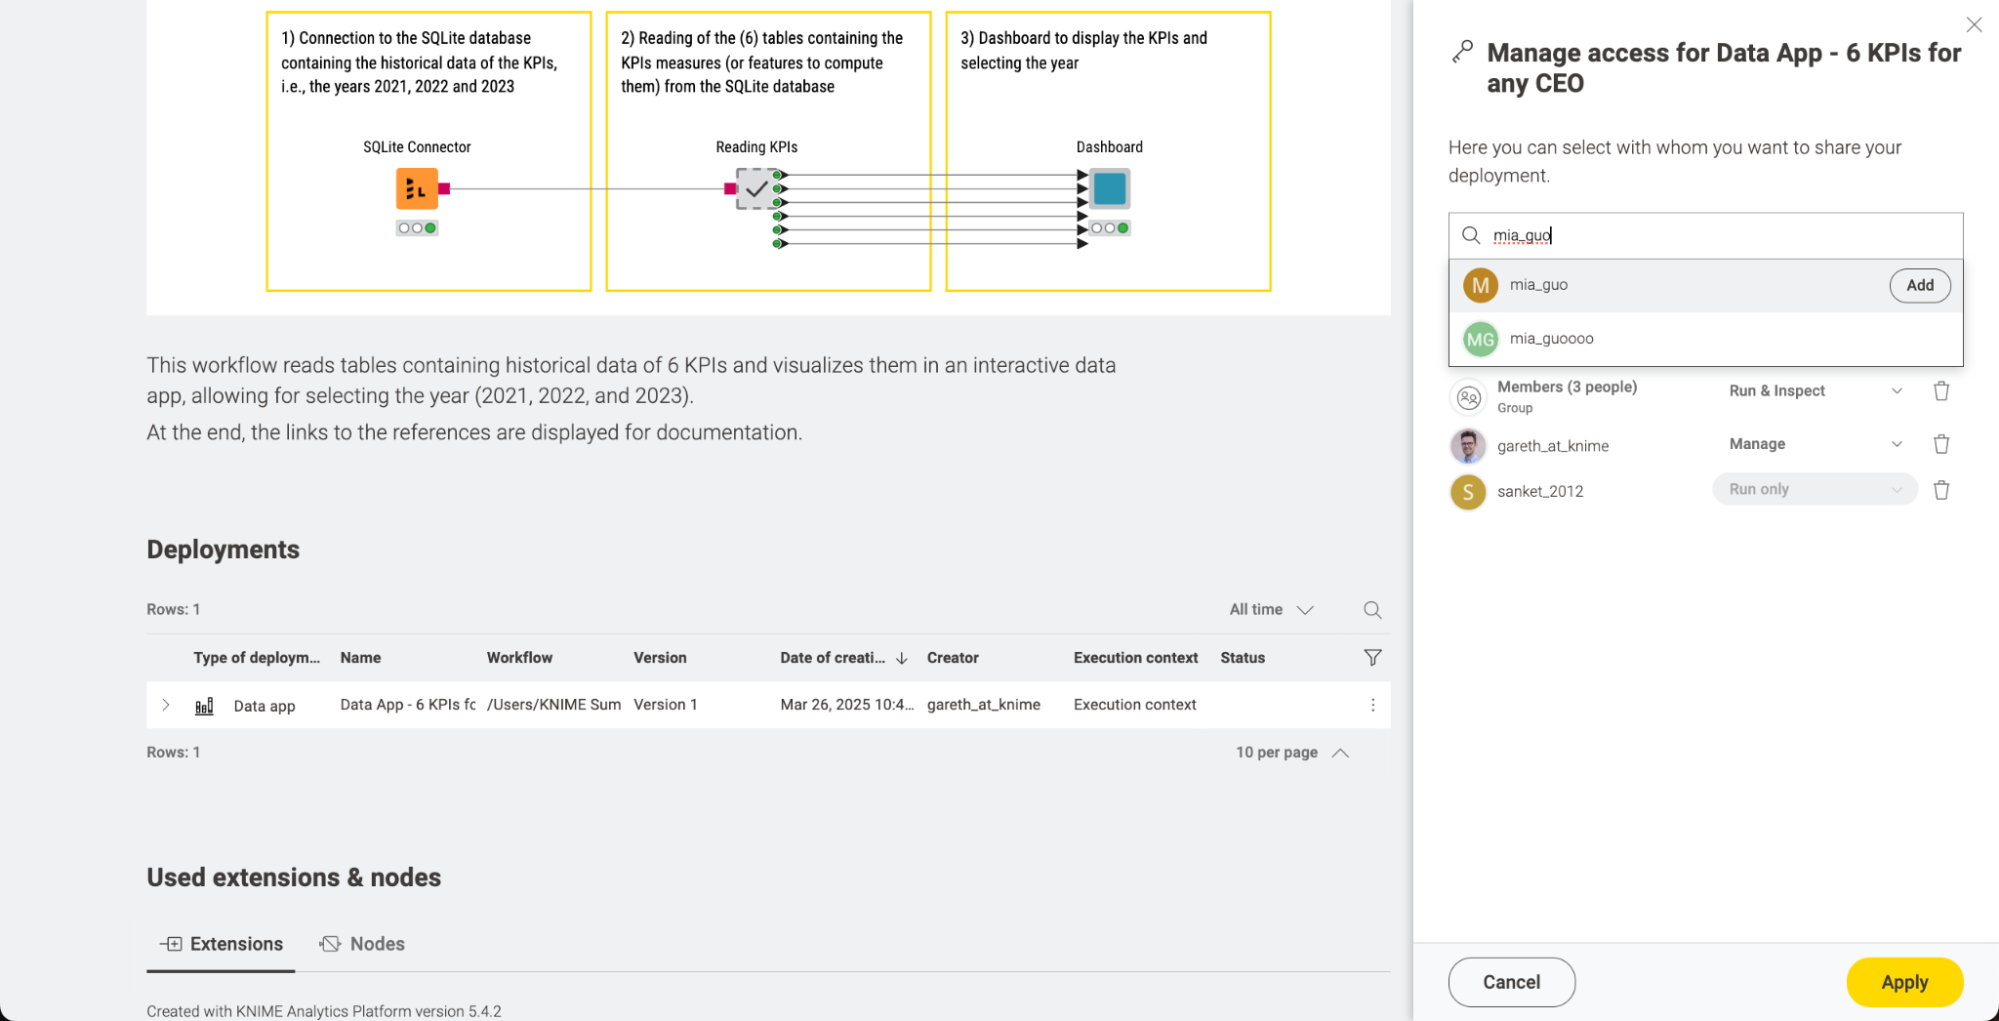
You can invite people to view the data app from the same kebab dropdown as above. Simply select “manage access” and invite the relevant team member who needs access to the data app.
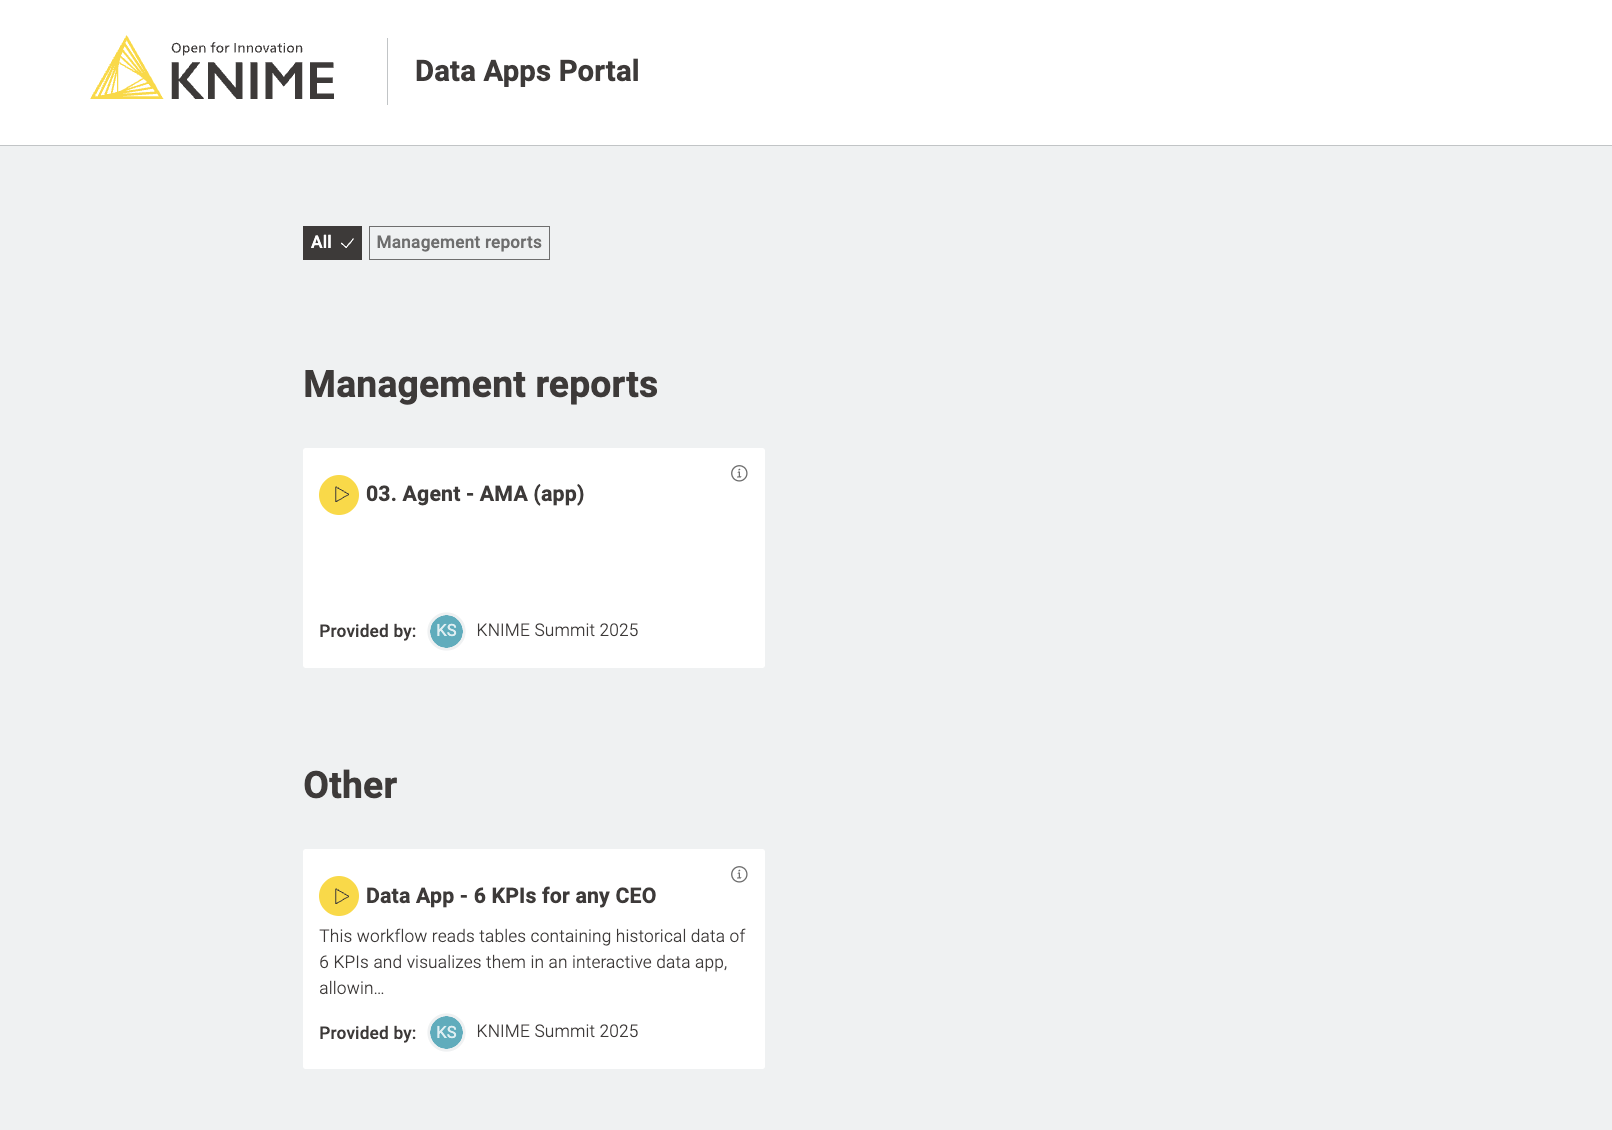
Anyone you have invited can see deployed data apps at https://apps.hub.knime.com/.
Start running and sharing data apps today with the KNIME Team plan
Data apps help you broaden the reach of data insights, improve collaboration across teams, keep analysis relevant and up to date, and make your analyses even more user-friendly. You can get started running data apps with a KNIME Team plan subscription for free for the first 30 days.
