When I start a new data science project with KNIME Analytics Platform, there are always a few questions I need to ask myself before I even pull in a single node to my blank workbench.
- “Can I train this kind of a model in KNIME?”
- “Which KNIME nodes will I need for this task?”
- “Has anyone else put together a use case like this with KNIME before?”
- “Can I download any KNIME workflows as inspiration?”
To answer all these questions, all I need to do is ask the KNIME Hub. The KNIME Hub has been available at hub.knime.com since March 2019 but many new features have now been added with the release of KNIME Analytics Platform 4.0.
Before we delve into the Hub’s more complex features, let’s have a look at some more basic examples first.
My particular focus at KNIME is Guided Analytics, particularly for machine learning automation, so if I am looking for a precise machine learning model, let’s say “XGBoost” or “Logistic Regression”, I can type the name into the search box and the KNIME Hub finds me a list of all the relevant nodes (Fig. 1) for me to scroll through and inspect. The search looks for nodes, extensions, components, and workflows not only among our own KNIME example workflows and components, but also among the workflows and components built by you, the community.
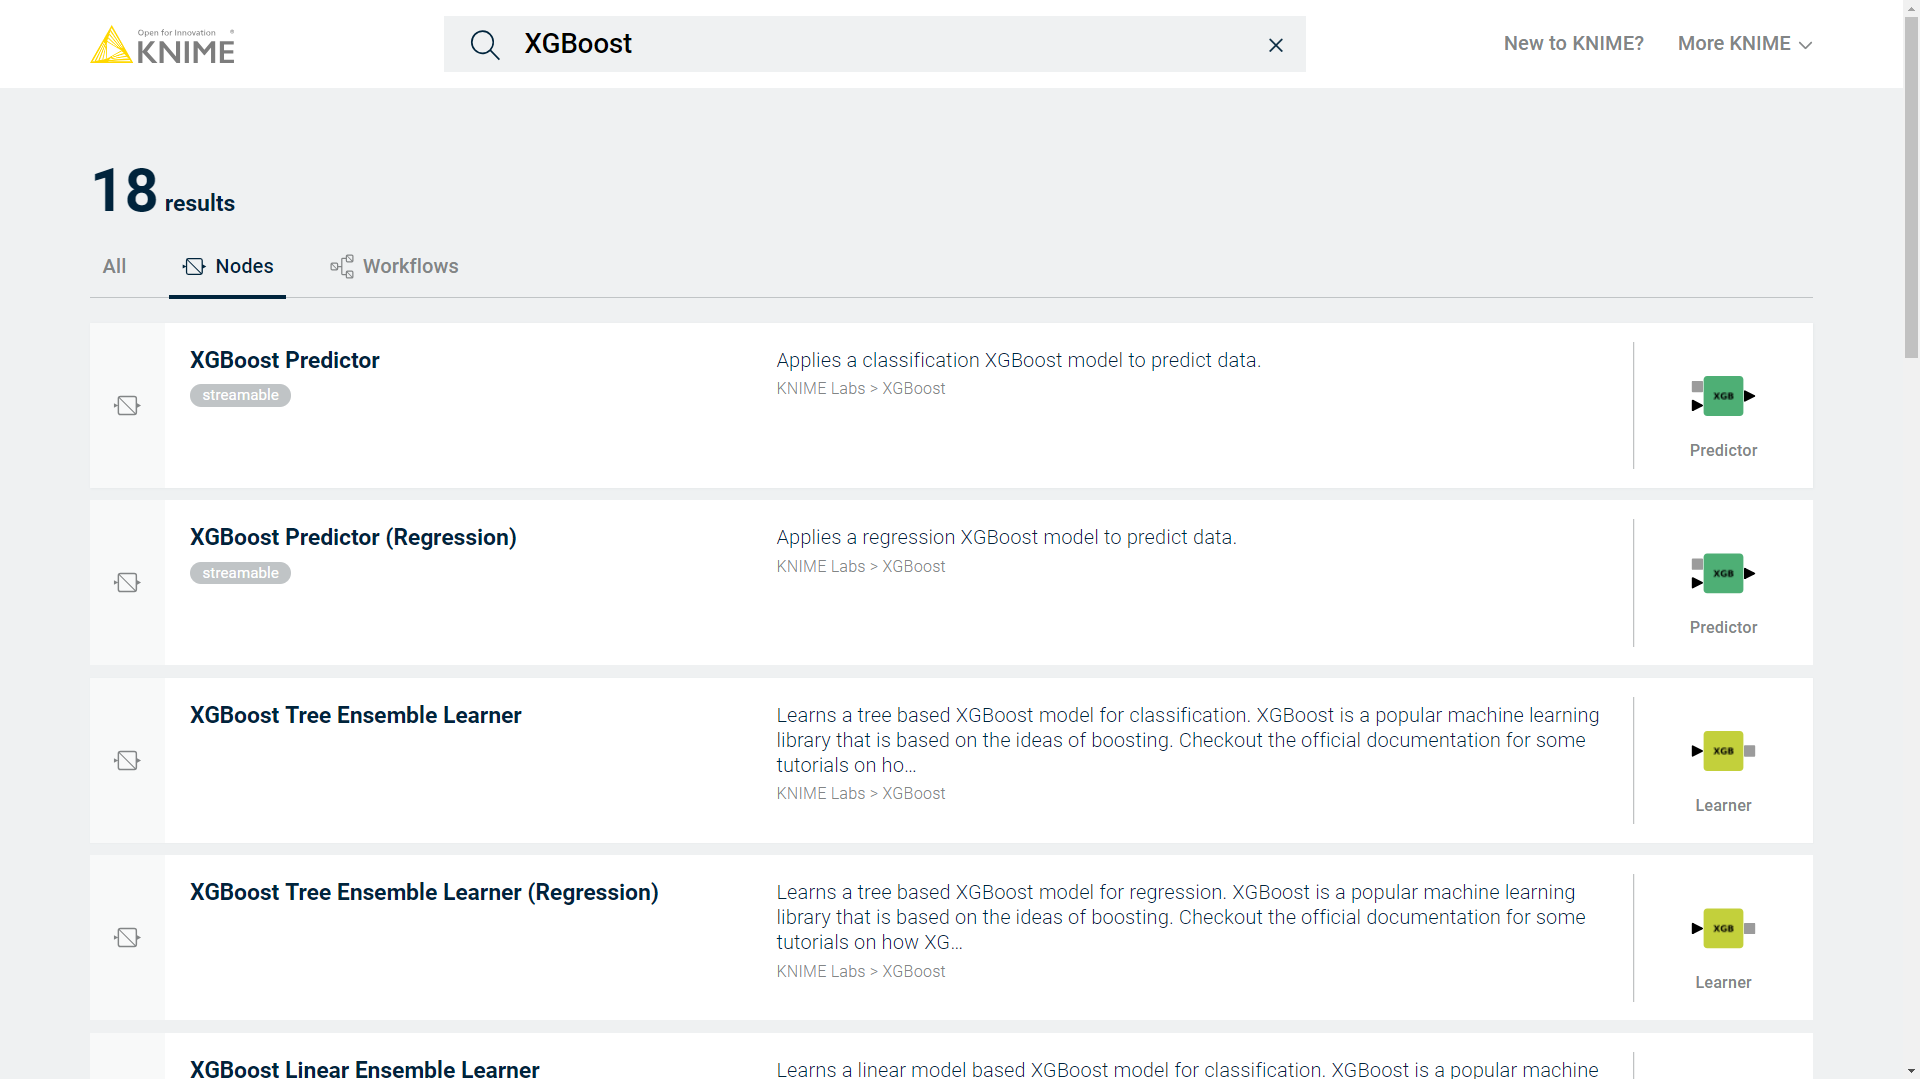
Figure 1. The KNIME Hub research listing the most relevant nodes for the query “XGBoost”
I can use the All, Nodes, and Workflows tabs to narrow down or widen my search. For example, if instead I am more interested in finding a complete analysis rather than a single key piece, I might want to know if someone else has already used KNIME for a certain use case: “sentiment analysis” or “fraud detection”, for example. In this case it means I’m not just looking for single nodes but for an entire KNIME workflow. Here, I type in my search term, click the Workflows tab, and the Hub shows me a list of all the workflows that match my query: "Fraud Detection". (Fig. 2).
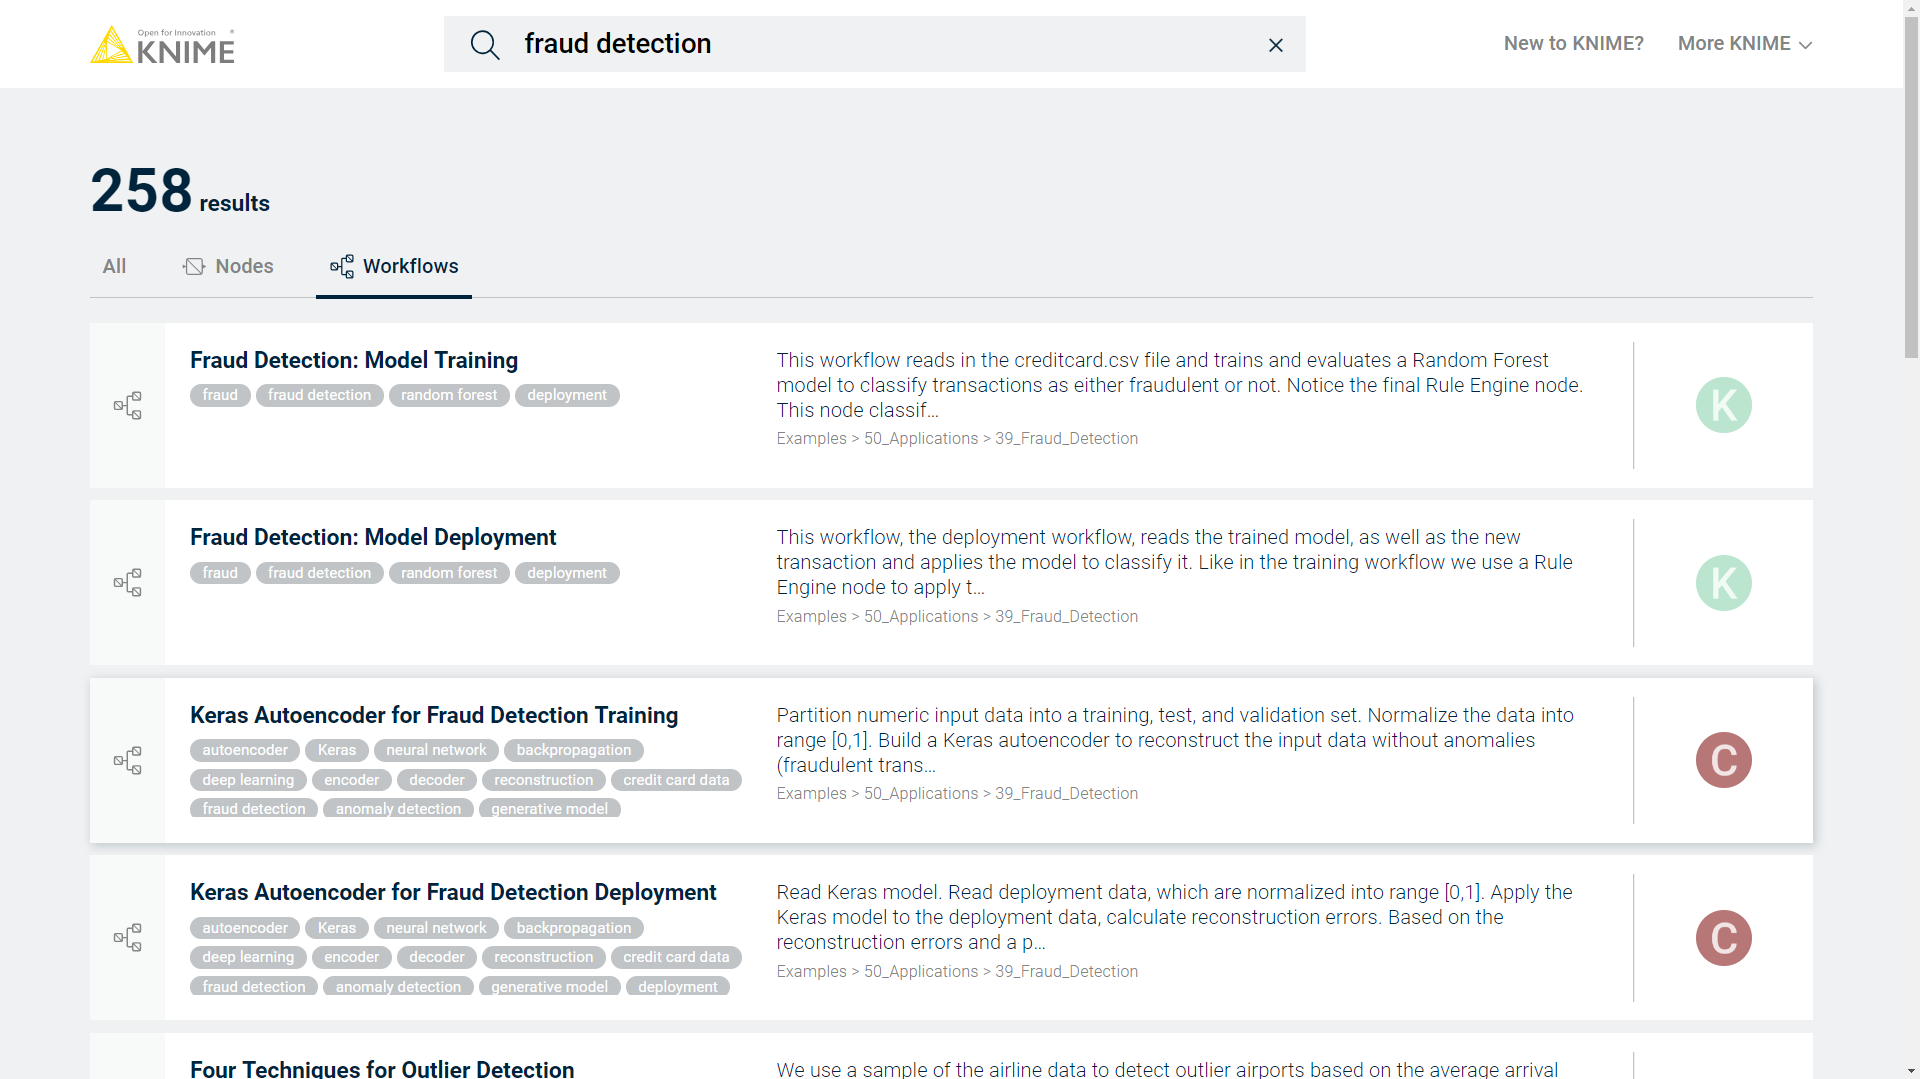
Figure 2. The KNIME Hub lists workflows matching the query “Fraud Detection”
Those are just simple queries, now let’s see more precisely what the KNIME Hub can do.
Let’s say I want to start a new project where I need to measure the performance of a predictive model. I open hub.knime.com on my web browser and I type “Model Performance” in the search box. I then select the first hit in the list, which is the workflow: “Evaluating Classification Model Performance” (Fig. 3).
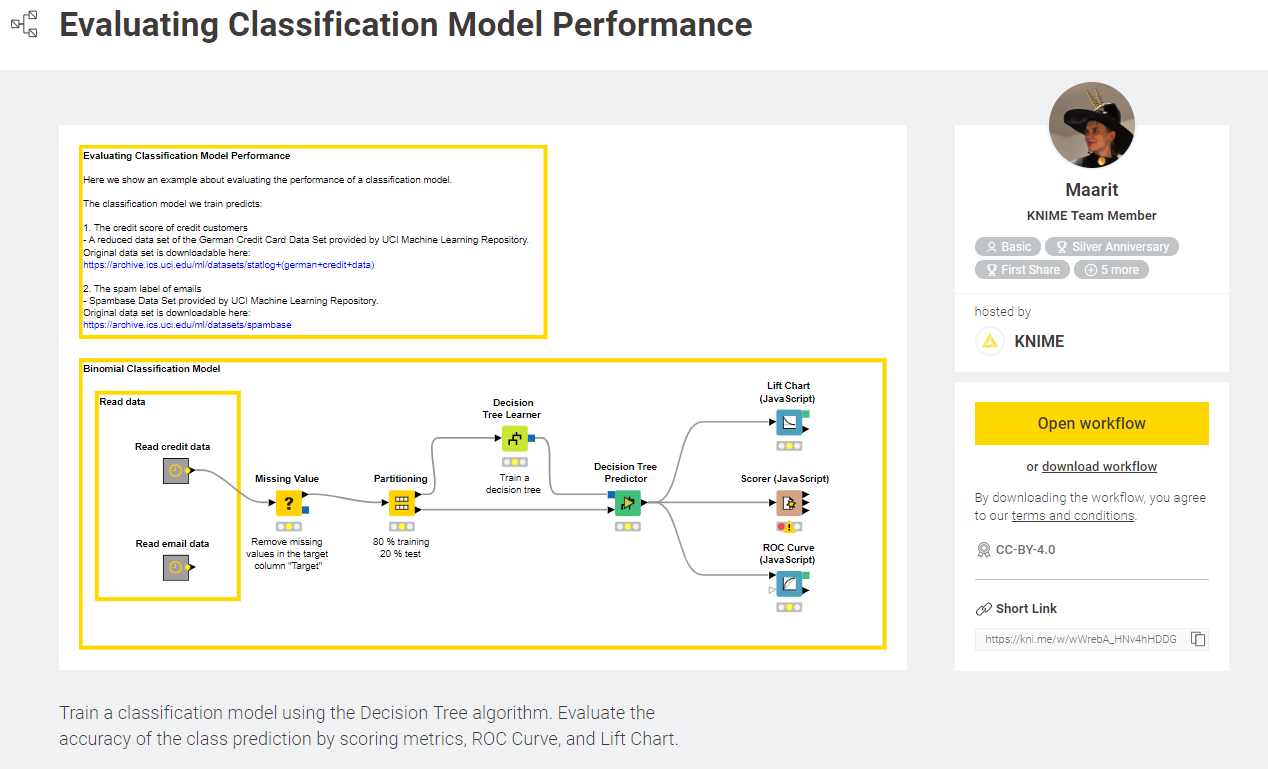
Figure 3. The KNIME Hub showing the workflow Maarit uploaded for explaining how you can inspect the performance of a model
The webpage for this workflow shows me a lot of useful information like the layout of the workflow with all of its nodes and branches; I can find more information about the author and her authentic KNIME Forum profile picture, review the associated license, and find a short link - handy to quickly share the web page with my coworkers.
If I want to use this workflow as a jump-start solution that I could then tailor to my data, I can simply download and open it in my KNIME Analytics Platform. On Windows operating systems, I can even open the workflow directly by clicking the Open Workflow button. This automatically downloads and opens the workflow in KNIME (Fig. 4).
Figure 4: Video showing how - on Windows - you can open the workflow directly by clicking the Open workflow button. This automatically downloads and opens the workflow in KNIME Analytics Platform. On other operating systems, click Download workflow to open it in KNIME Analytics Platform.
However sometimes you might have questions about the usage of the workflow.
For example I might wonder “why the ROC Curve node was used? How does this node work?”
Scrolling through the list of the nodes used in the workflow, below the workflow image, I can select this node and open the web page describing the node (Fig. 5).
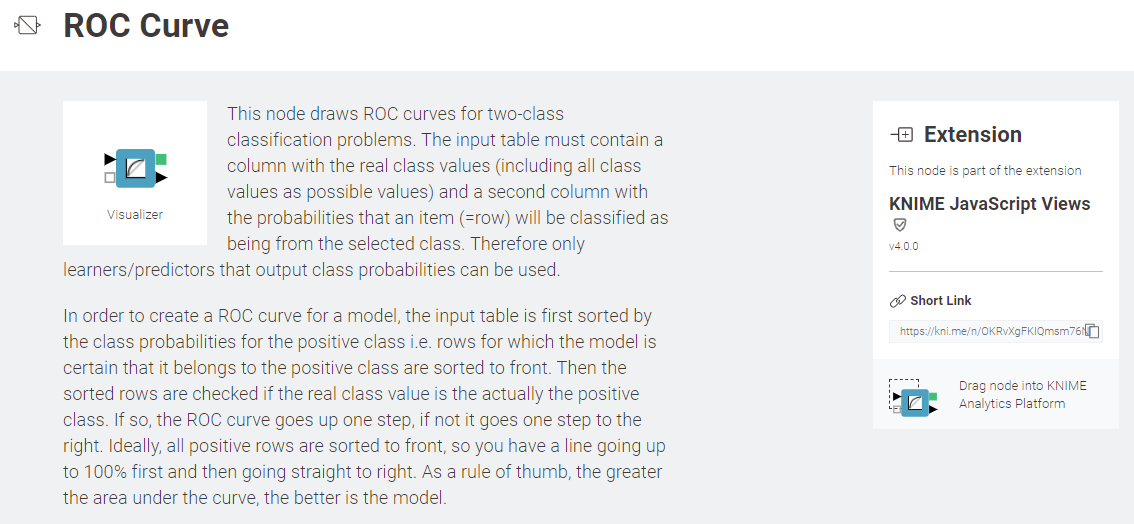
Figure 5. KNIME Hub is able to display all the info available about a node via a web page
The node description, the same description you’ll find in KNIME Analytics Platform, is shown, along with linked external resources such as academic papers, blog posts, and videos.
So, in addition to reading the technical information about the specific node (its ports, functions, implemented algorithm, ...), I can scroll to see a list of workflows where it is being used and also see what other nodes are used in combination with it. I can see in the list that the ROC Curve is used in the workflow “Evaluating Classification Model Performance”.
No matter how much information is available, sometimes I might have more questions and need to talk to the workflow author directly, in this case Maarit, to ask a particular question. I can do this by scrolling down to the bottom of the page, where I can comment below the workflow to start a discussion and ask my questions (Fig. 6). The discussion will also be referenced on the KNIME Forum where experienced KNIME users will find and answer your questions.
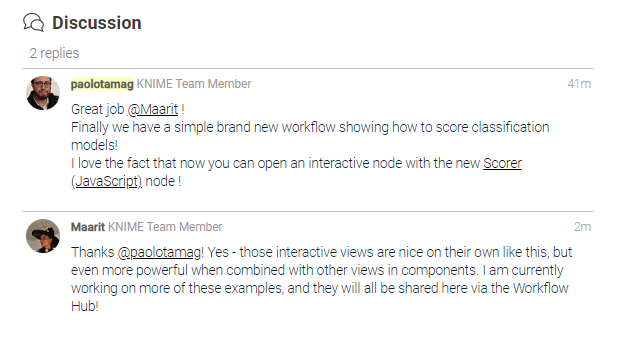
Figure 6. Two users (Maarit and I) discussing the workflow “Evaluating Classification Model Performance” directly on the KNIME Hub
There are still more features you need to see about the KNIME Hub.
Let’s say I opened a workflow and I now want to use the ROC Curve node. I go to my Node Repository in KNIME and look for the node, but can’t find it. This is probably because my installation lacks the required KNIME Extension. We noticed in past years that finding the right extension for a given node and installing it can be cumbersome and time consuming.
You can now drag nodes from the KNIME Hub instead. In fact you can drag any node image displayed on KNIME Hub to your KNIME Analytics Platform via the web browser. The node is added to the workflow just like it would have been from the Node Repository. If an extension is required, this is automatically detected and a window appears asking you to install it (Fig. 7).
Figure 7. This video shows how you can simply drag and drop a node from the KNIME Hub to KNIME Analytics Platform to use it on your own data. Any node image you find on hub.knime.com can be used to drag and drop the pictured node
The KNIME Hub for Collaboration
Often when you're working on a big project you end up collaborating with different data scientists. The data science team needs to agree on a number of things; the KNIME Hub gives you the opportunity to share the nodes and workflows you are proposing to the rest of the team via simple shortened links. And now with the KNIME Analytics Platform 4.0 release you can also share your own workflows and components.
Sharing your own workflow on the KNIME Hub is quite easy. First, you need to update KNIME Analytics Platform and connect to the new My-KNIME-Hub mount point in your KNIME Explorer. Double click My-KNIME-Hub and a new dialog appears in your browser window. You can now log in, using the same account you already use on KNIME Forum, or you can register a new KNIME.com account. After logging in you can upload your workflows to the KNIME Hub by simply dragging and dropping from your LOCAL workspace to your My-KNIME-Hub just like the video shows (Fig. 8). Right click on an uploaded workflow and select “Open > in KNIME Hub” to see the associated public web page.
Figure 8. This video shows how you can share your workflow via the KNIME Hub. Authenticate first with your KNIME account or register. You can then simply drag and drop your workflows via the new My-KNIME-Hub mountpoint
To edit things like title, description, keywords for the search engine and external links you need to change the workflow’s metadata before uploading. To do so, select the workflow you want to edit in the KNIME Explorer. You’ll see the Description panel displaying the current information. You can edit the so-called metadata by simply interacting with the panel, typing in all the infos and saving them. Once the workflow is updated in your My-KNIME-Hub personal space, you will see the web page showing the same info you just typed in (Fig. 9).
Figure 9: This video shows how to edit the metadata of a workflow via the Description panel. The information is then displayed on the public workflow web page on KNIME Hub
In your v4.0 of KNIME Analytics Platform, you might notice an additional box on the Welcome page. This is the KNIME Hub Search panel. Access this panel via “View > KNIME Hub Search” and search nodes and workflows directly from KNIME Analytics Platform (Fig. 10).
Figure 10: This video shows how to query for nodes and workflows via the KNIME Hub Search panel directly from KNIME Analytics Platform.
Conclusion
Stay tuned as in the coming months more features of the KNIME Hub will come out! In the meantime go ahead: search, download, share and comment your data science projects with the KNIME Hub!
