To begin any data analysis, the first step is to gain access to data. However, accessing data, especially from cloud-based data sources can quickly get challenging because of the complexity of cloud infrastructure, sheer volume of data, and the variety of formats in which data is stored.
A tool like KNIME Analytics Platform lets you connect easily to over 300 data sources whether its SQL databases or cloud-based storage like Google Cloud, Snowflake, Amazon S3, or Azure using pre-built connectors. These pre-built connectors remove the need for technical expertise in SQL or custom coding to interact with cloud APIs, making it easy for you to pull in data directly from cloud-based resources.
In this article, we will show you the steps involved in connecting to various cloud-based data sources to:
- Access data from Google Cloud
- Access data from Google BigQuery
- Access data from Snowflake
- Access data from Microsoft Azure
This is the first part of a series of blogs on connecting to different data sources.
Access Data from Google Cloud
To access data from Google Cloud, start with authenticating your Google account using the Google Authenticator node. Next, use the Google Drive Connector, Google Sheet Connector, or Google Analytics Connector nodes to connect to the data.
There are two ways you can authenticate with your Google account:
- API Key authentication
- Interactive authentication
Please note that if you want to execute the workflow ad hoc or schedule it to run automatically on KNIME Community Hub, then we recommend using API key authentication.
API Key authentication
- To access the data from Google Cloud, refer to this guide to learn how to create an API key and to find out more about the general usage of the Google Authenticator node.
- For example, your folder structure on the KNIME Community Hub looks like the one below, meaning that your API Key file is stored in your space:
—-
<space> -> <folder> -> <api-key.fileformat>
—-
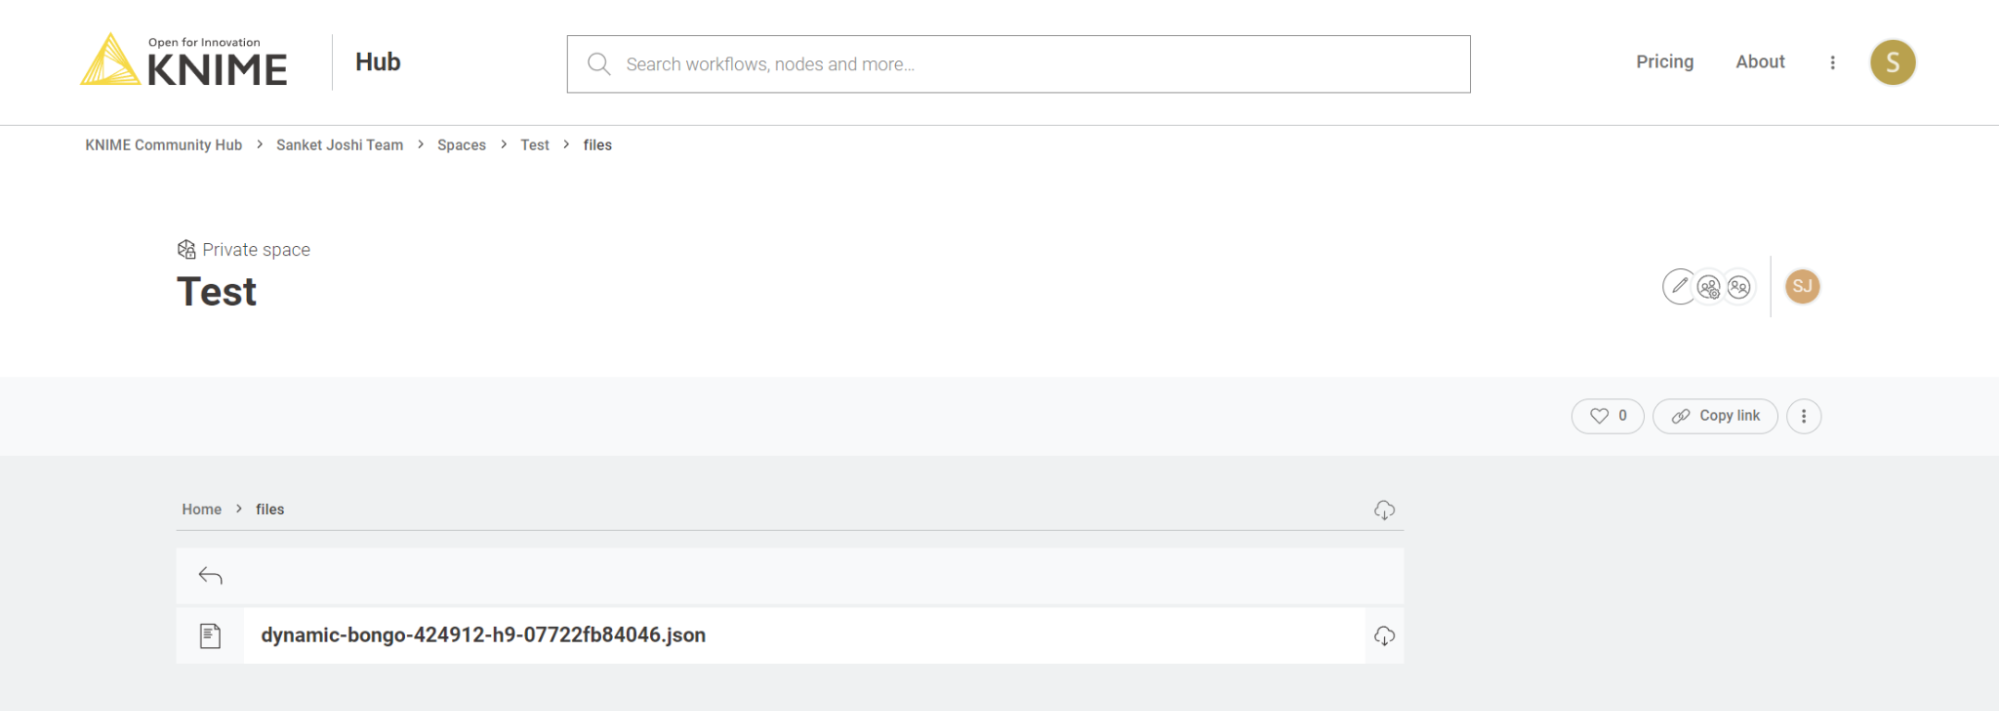
Note: When using the API Key authentication method, the API key file must be stored in a location that is accessible to the node for the workflow execution to be successful.
This means that you can access the API key using either one of the following paths in the Google Authenticator node configuration dialog.
- Mountpoint relative:
knime://knime.mountpoint//<folder>/<api-key.fileformat>
- Workflow relative:
knime://knime.workflow/../<api-key.fileformat>
- Workflow Data Area:
knime://knime.workflow/data/<api-key.fileformat>
Ensure that you have stored the JSON or p12 file in the workflow's Data folder.
If the folder does not exist, create one, store the file inside, and then upload the workflow to KNIME Community Hub.
Interactive authentication
- When using the interactive authentication method, you have to sign in manually to your Google account.
- You select the Authentication Type -> Interactive and add relevant scope and permissions.
- Once you click on the Login button, you will be asked to sign into your google account in a new popup window.
Once you establish the connection, you can read the data and create the rest of your analytic workflow based on it. Browse and reuse these readymade workflows to get started quickly with analyzing Google Cloud data.
Access data from Google Big Query
BigQuery is Google Cloud’s fully managed and completely serverless enterprise data warehouse.
Follow these steps to authenticate and connect with Google Big Query:
- Once you are authenticated with Google using the Google Authenticator, as described above, you can connect to Google BigQuery using the Google BigQuery Connector node. However, due to license restrictions, you must first install the latest version of the Google Big Query JDBC driver, which you can download here.
- Once you have downloaded the driver, extract it into a directory and register it in your KNIME Analytics Platform as described here.
- When registering the driver, make sure to use bigquery_154 as the ID and bigquery as the database type of the driver since it needs to match the driver's ID in the Community Hub Executor. So your driver registration dialog should look like this where C:\KNIME\JDBC\BigQuery\SimbaJDBCDriverforGoogleBigQuery42_1.5.4.1008 is the directory that contains all the JAR files.

Now that you can access data on Google Big Query, take a look at these sample workflows on KNIME Community Hub to get started with your analysis.
Access data from Snowflake
Snowflake is a SaaS data warehouse tool for storing and managing data.
Here are the steps to authenticate and connect to Snowflake:
- To connect to Snowflake from KNIME Analytics Platform, refer to this information on Snowflake integration.
- Then use the Snowflake connector node to authenticate and connect to the Snowflake Database from KNIME Analytics Platform.
- The credentials could be stored inside the node, which is not recommended, or passed to the node using the Credentials Configuration node so that your team members also have access to the workflow when they need to use it through KNIME Community Hub. The Credentials Configuration node only allows the team admin to pass the credentials while deploying the workflow.
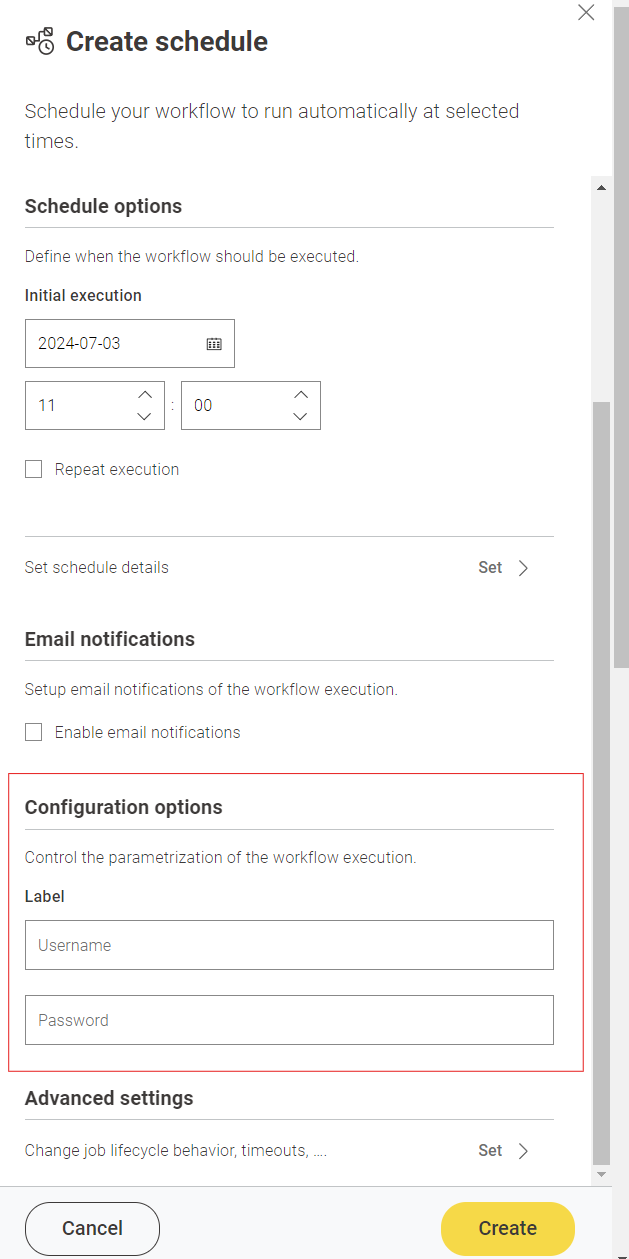
Once you are authenticated and connected to the Snowflake Database, you can use the data for further data analysis. Check out some examples on the KNIME Community Hub on how to use Snowflake using KNIME.
Access data from Microsoft Azure
Azure is Microsoft's cloud computing platform that provides a wide range of services for building, deploying, and managing applications and infrastructure in the cloud.
Follow these steps to authenticate and connect with Microsoft Azure:
- To connect to Microsoft Azure from KNIME, refer to this integration guide.
- To authenticate on Microsoft Azure, use the Microsoft Authenticator node in KNIME Analytics Platform and select Azure Storage Shared Key as the Authentication type.
- Enter the Storage Account Name and Shared/Access key to authenticate.
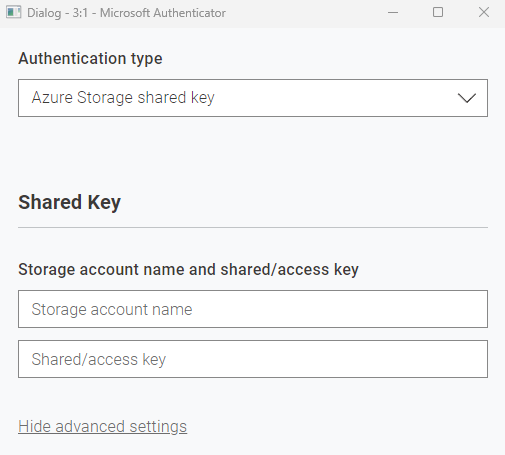
The credentials could be stored inside the node, which is not recommended, or passed to the node using the Credentials Configuration node. This will allow the team admin to pass the credentials while deploying the workflow, as shown in the below snapshot.

Once authenticated, use the Azure Data Lake Storage Gen2 Connector node or Azure Blob Storage Connector node and specify the working directory from where you want to access the data.
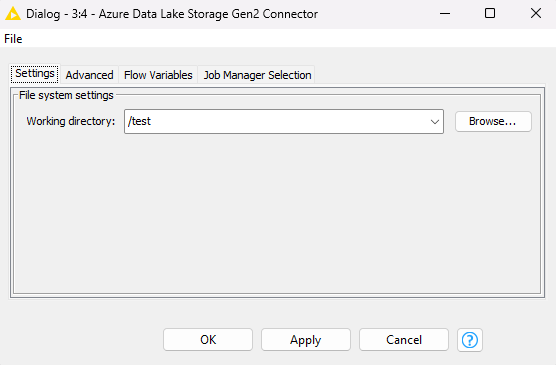
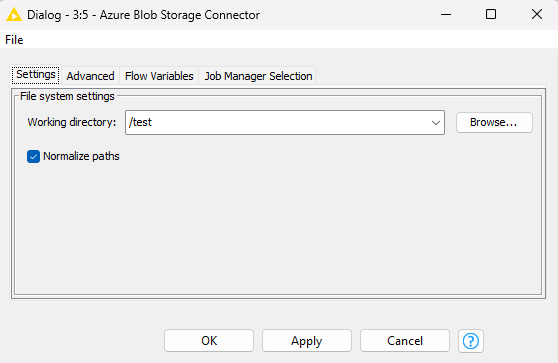
Enter the file name in the respective file reader node and read the file.

Once the connection is established, we can read the data from Microsoft Azure and work with it in KNIME. On KNIME Community Hub, you will find more examples and use cases related to using Microsoft Azure data in KNIME.
What’s next? Automate cloud data analysis
Now you know how to connect to data on Google Cloud, Google Big Query, Snowflake, and Microsoft Azure using KNIME Analytics Platform. The next step is to create a visual workflow to analyze the data that you have pulled in.
Once your workflow is ready, you can use the Team plan on KNIME Community Hub to set it to run automatically at the frequency you desire.You only need to connect to data and build your workflow once and you can run it over and over again without having to start from scratch. The workflow keeps pulling in fresh data and applying your transformations, ensuring that you always have updated reports without any manual intervention.
Here’s a quick summary of how you can run your workflows using the Team plan.
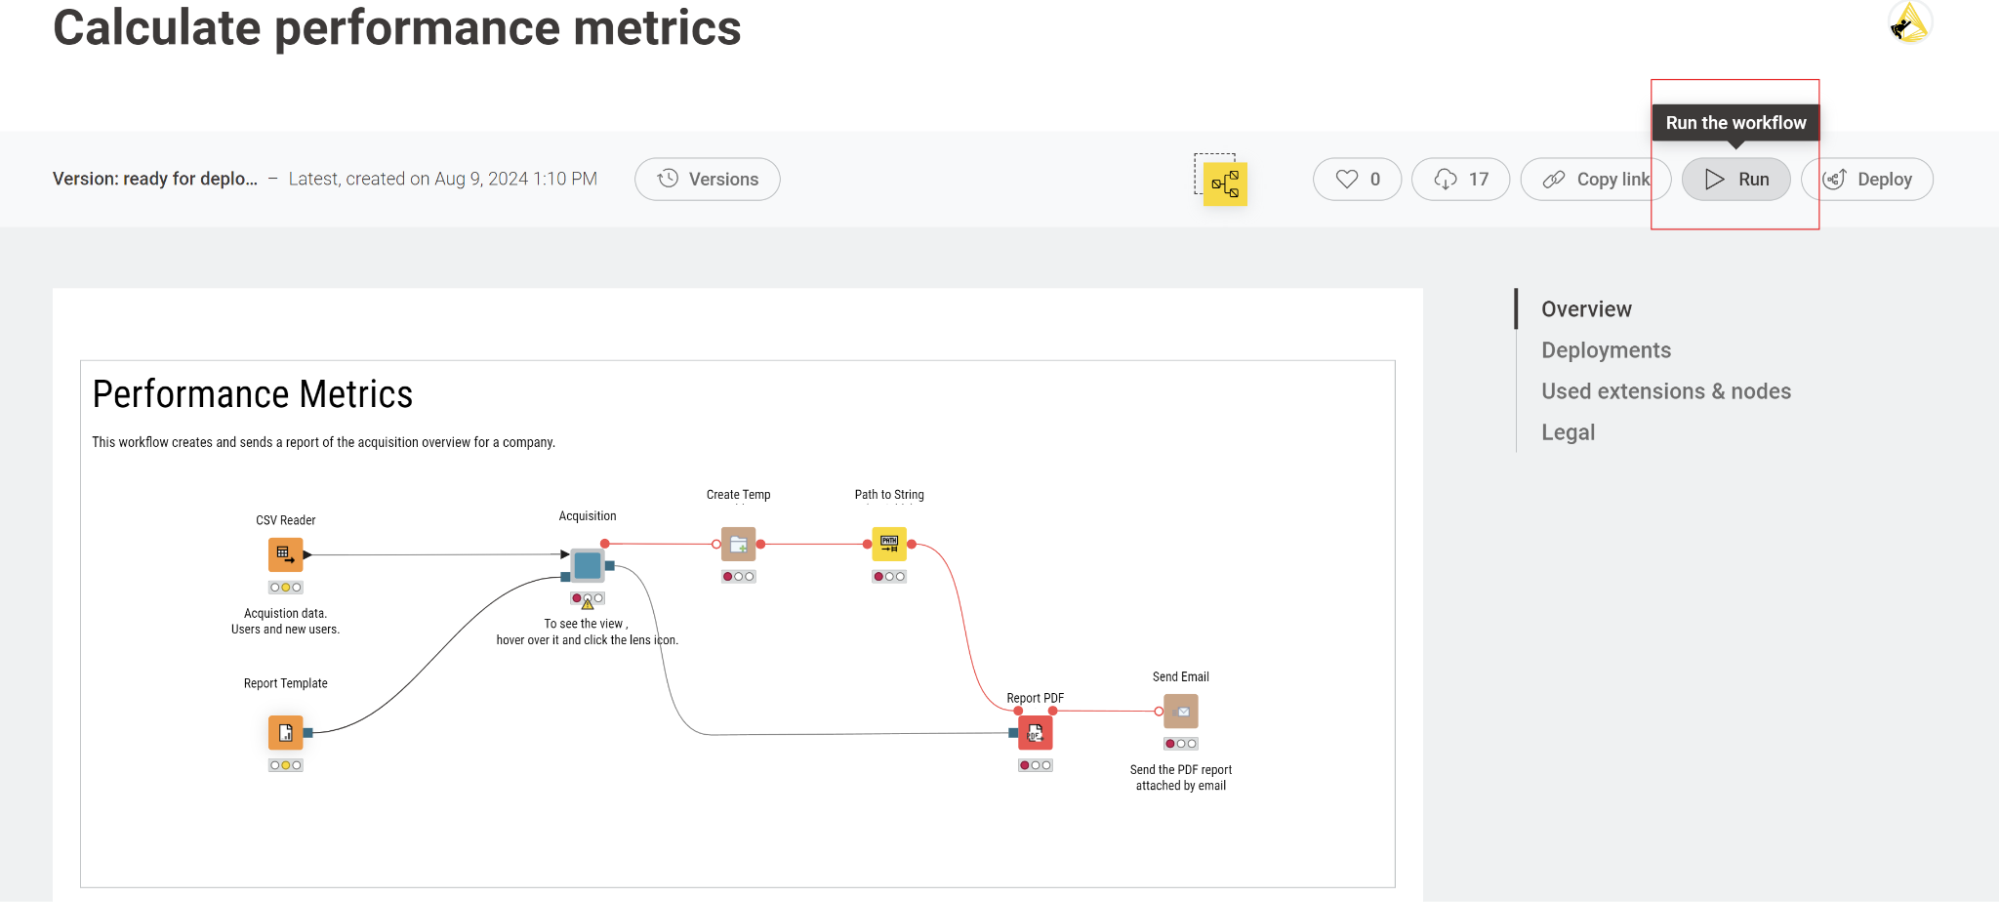
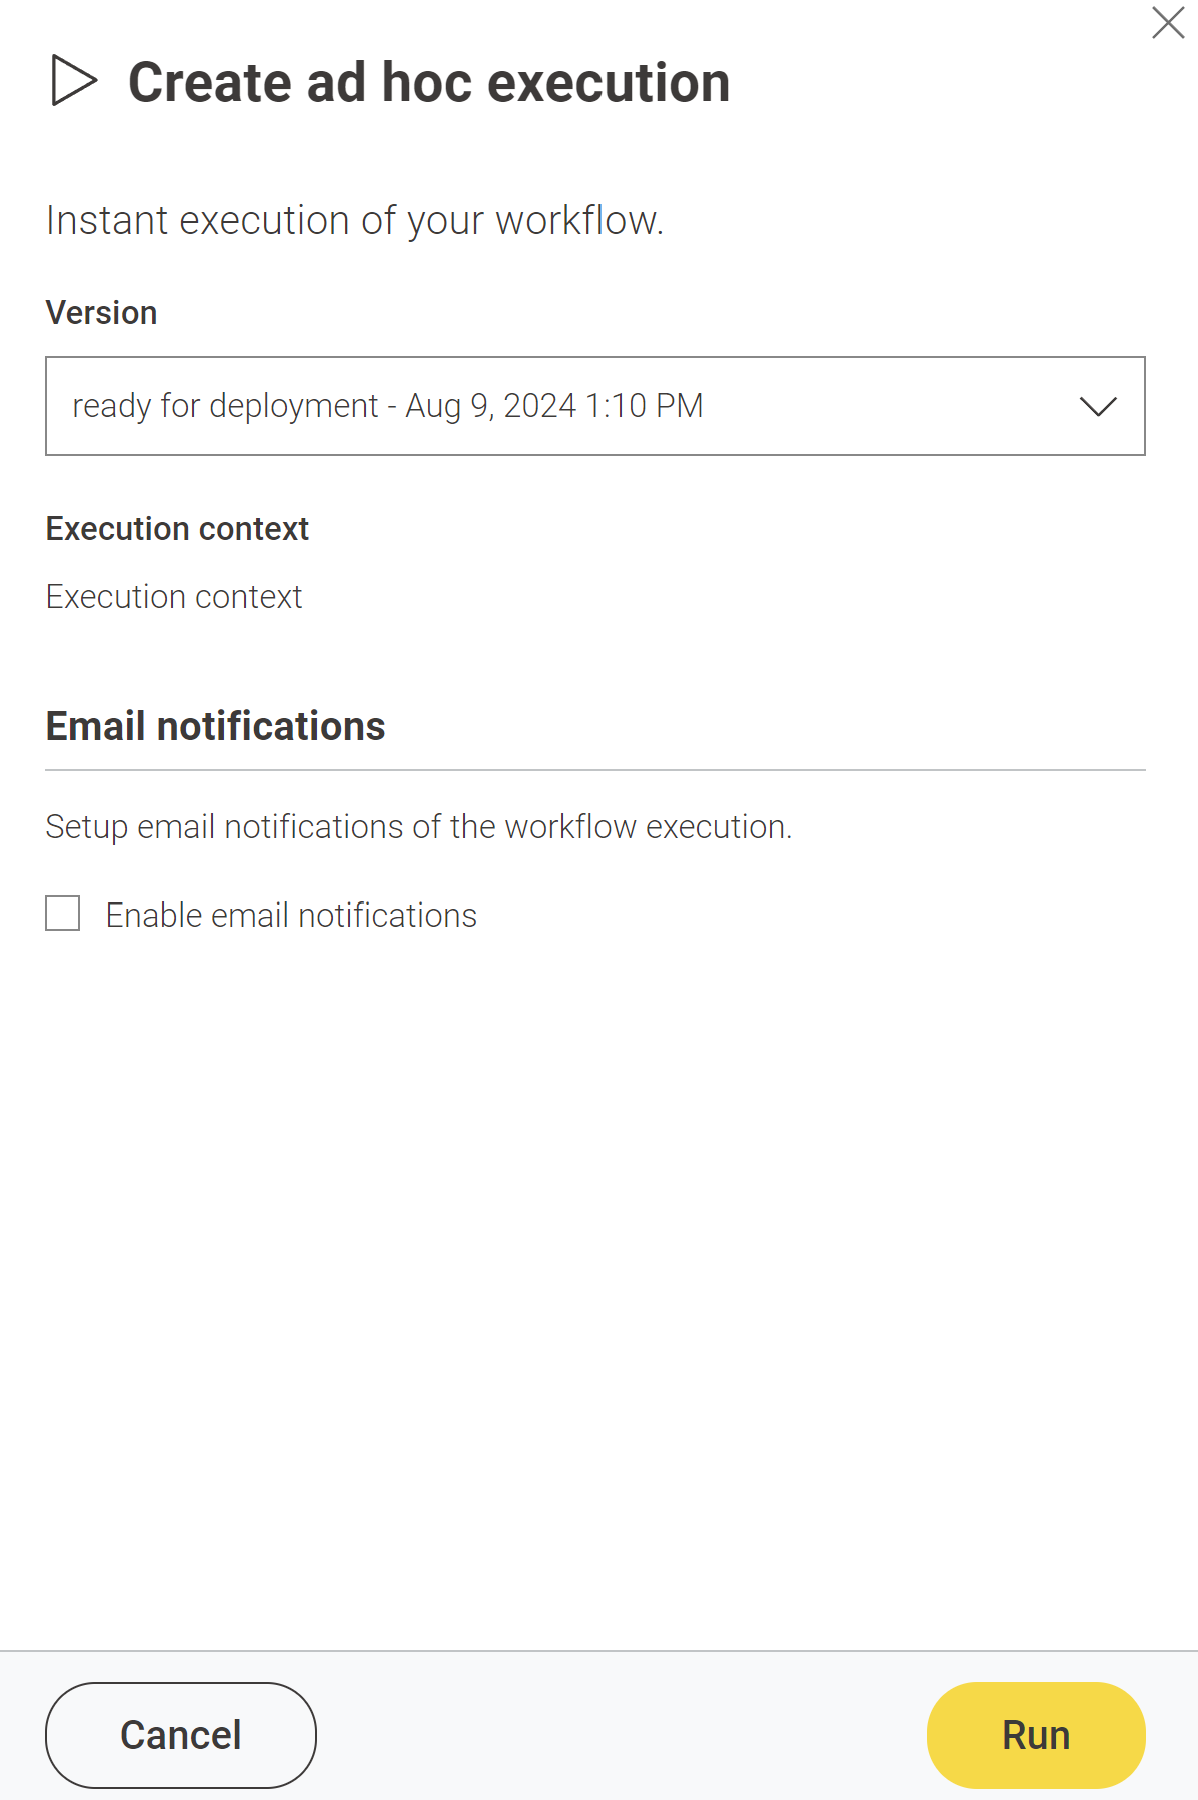
As shown in the above image, you can perform ad hoc execution by clicking on the Run button. This will open a panel where you can select the version of the workflow you want to run and set up email notifications.
To schedule a workflow to run automatically, click on the deploy button as shown below.
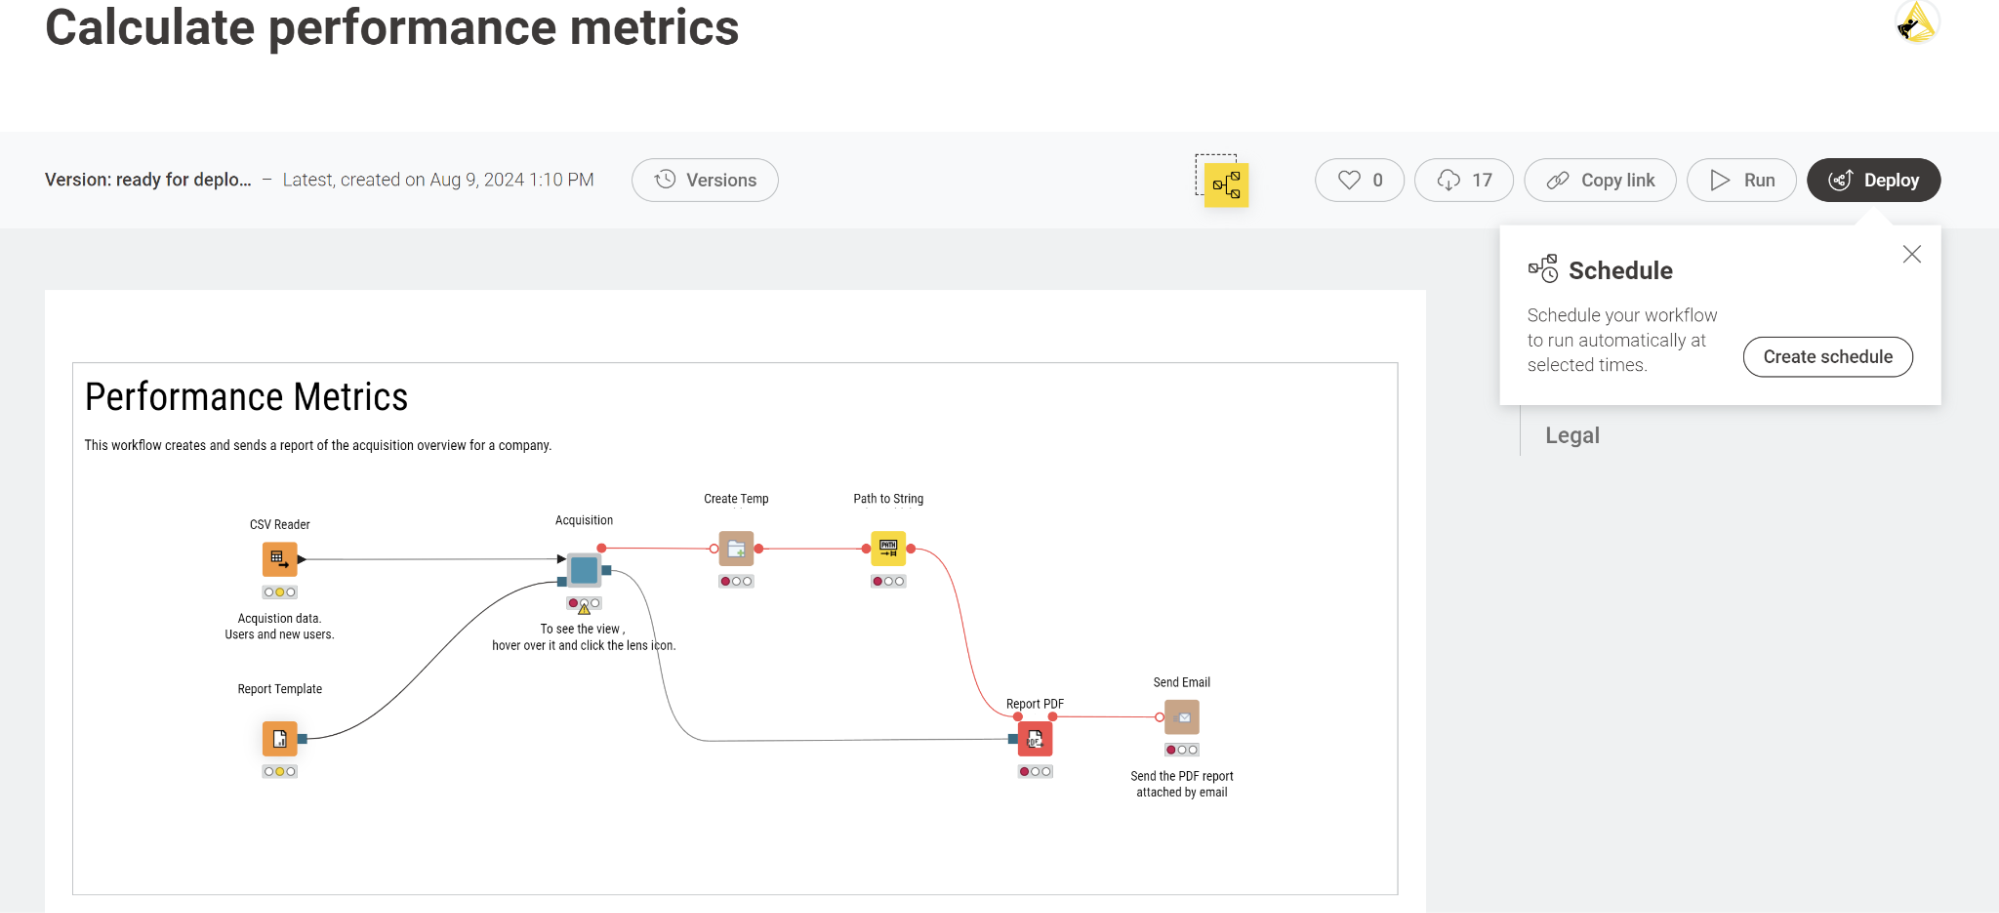
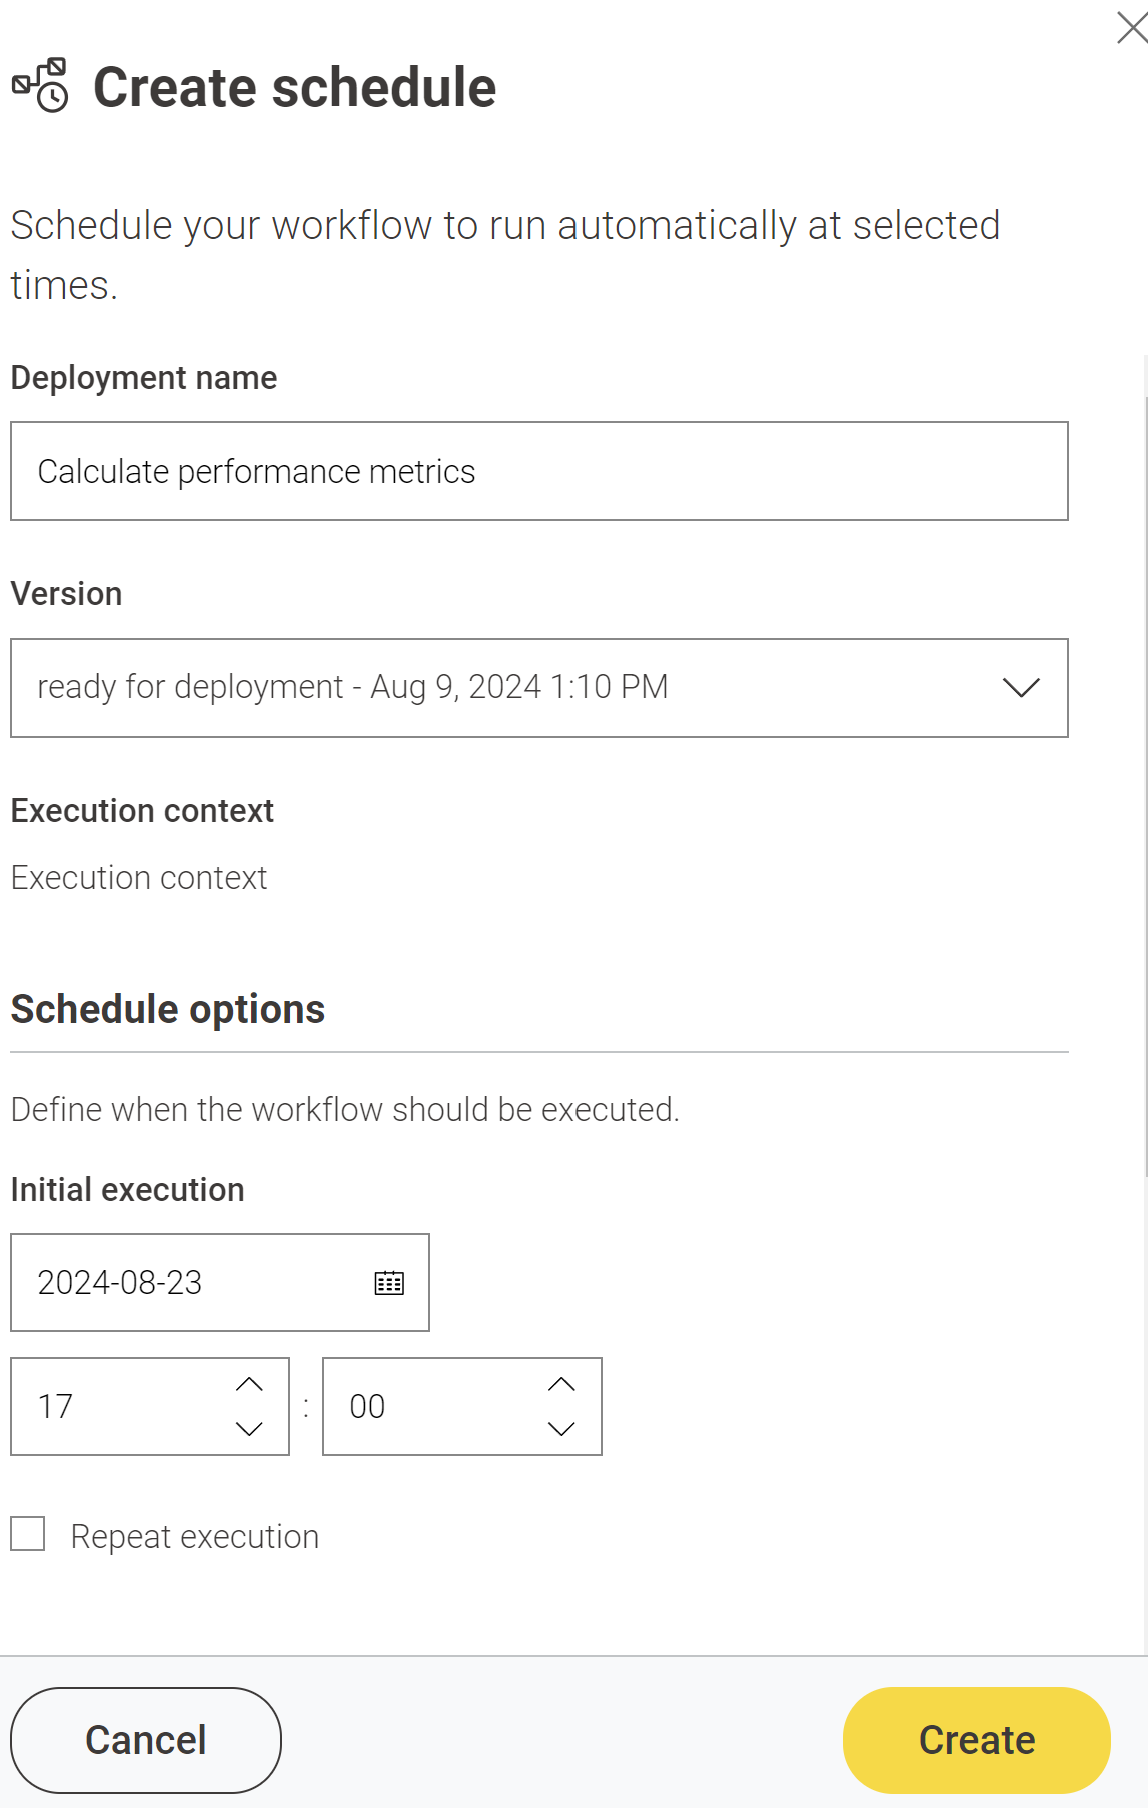
Once you click on the deploy -> create schedule button, a panel will appear on the left side where you can set up additional details like the deployment name, workflow version, and scheduling options, as shown below.
This is how you can connect to multiple cloud-based data sources and automate your workflows using the KNIME Team Plan in just a few clicks.
Learn more about the KNIME Community Hub Team plan here. Additionally, here is a detailed guide to help you automate your first workflow.
