The competition among tech giants to develop high-performing, low-cost, and open-source models is heating up.
In January 2025, the Chinese company, DeepSeek AI, released two very powerful, low-cost and open-source LLMs for chat and reasoning: DeepSeek-V3 and DeepSeek-R1. These models promise high performance and an easier way into using AI capabilities without the cost of proprietary models. Just a week ago, OpenAI released its o3-mini.
The latest version of KNIME Analytics Platform gives you the functionality to connect to DeepSeek’s chat and reasoning models and OpenAI o3-mini, as a part of the KNIME AI extension. These new features further expand your possibilities to build AI-driven applications using visual workflows, ensuring your AI pipelines are transparent and easy to document and explain.
This article walks through how to use the DeepSeek nodes to authenticate, connect, and prompt. What we show here is very similar to how you connect to other models in KNIME, for example OpenAI (including o3-mini), Azure OpenAI, Databricks, Hugging Face, GPT4All, and Ollama.
Access DeepSeek's AI models with the KNIME AI Extension
You can access DeepSeek’s AI models with the KNIME AI extension in KNIME Analytics Platform versions 5.4.1 and above.

The KNIME AI extension provides a comprehensive suite of features for integrating with both open-source and proprietary AI models for chat and embeddings across various providers and platforms.
The extension enables users to interact with models, create and manage vector stores, design RAG systems, and develop intelligent agents. It also enables users to access libraries for LLM and RAG evaluation, while KNIME Business Hub offers tools for GenAI governance, such as an AI gateway.
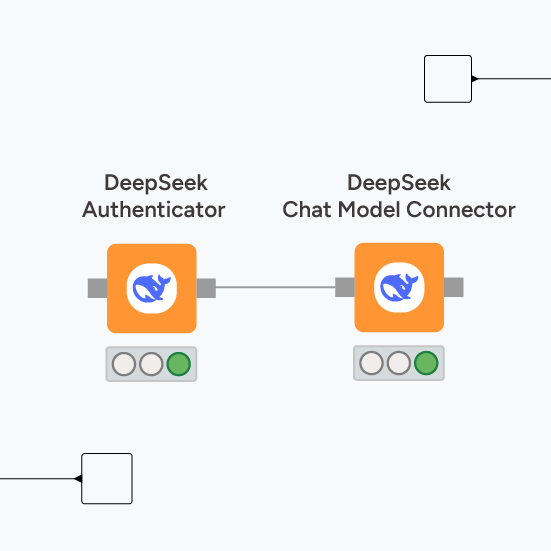
It now has two additional nodes for authentication and connection to DeepSeek’s models:
- DeepSeek Authenticator authenticates with all DeepSeek models by letting users select the credentials that contain a valid DeepSeek API key. Credentials can be set on the workflow level or created inside the workflow (e.g., with the Credentials Configuration node) and fed into this node via a flow variable.
- In the advanced settings, the node also supports the input of a base URL. For example, for models accessible via Ollama, it’s possible to specify the URL of a local host and consume them locally.
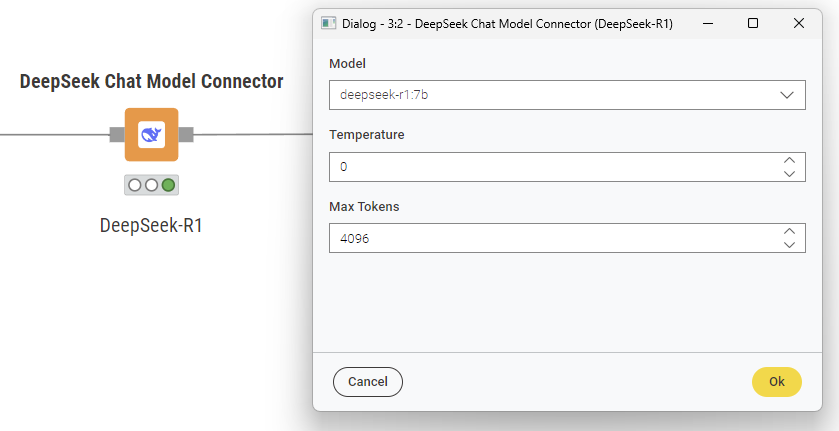
- DeepSeek Chat Model Connector establishes a connection with the predefined list of available DeepSeek models. The node allows users to define the model temperature and max tokens.
How to use DeepSeek’s V3 and R1 in KNIME: Authenticate, connect, prompt
o integrate DeepSeek’s models into KNIME’s visual workflow, we follow the usual authenticate, connect, prompt approach. The latter applies whether we're interacting with V3 and R1 via the official API – offering scalable consumption with a pay-as-you-go pricing policy – or using the open-source versions released by DeepSeek AI, which are freely available for download from repositories like Hugging Face, Ollama, and others.
For local execution, DeepSeek has also released six “distilled” open-source versions of R1 (including Alibaba’s Qwen-2.5), ranging from 1.5 to 70 billion parameters.
The following example shows how to access DeepSeek-R1 in KNIME in three steps.
Step 1. Authenticate to DeepSeek API or establish a gateway to Ollama
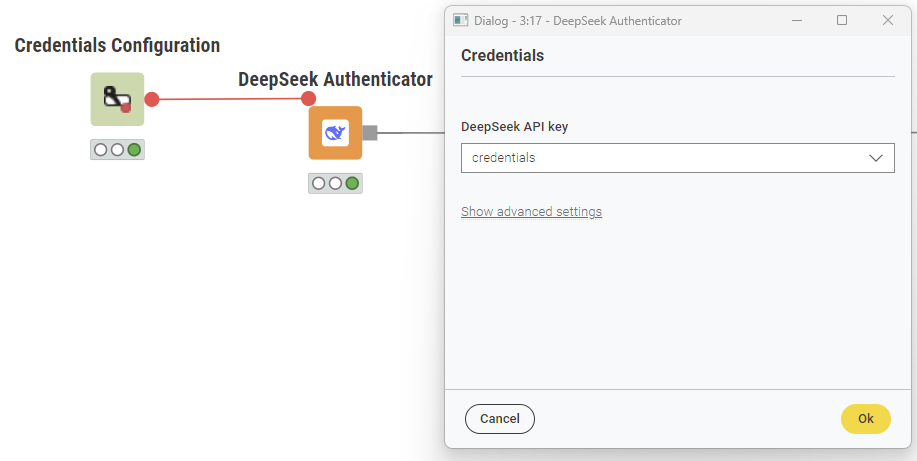
Authenticate to the DeepSeek API:
- First, create an account on DeepSeek AI and generate an API key.
- Enter the API key in the password field of the Credential Configuration node (the username is ignored).
- Now select this credential as a flow variable in the DeepSeek Authenticator and execute the node to finalize the authentication.
Establish a gateway to Ollama:
After setting up Ollama and downloading DeepSeek-R1 (e.g., 7B) for free on our machine, the first step involves establishing a gateway to the Ollama server.
- Use the DeepSeek Authenticator node to set up a gateway to the Ollama server, via Ollama’s built-in compatibility with OpenAI. Why is the compatibility with OpenAI relevant? Because the DeepSeek API relies on the OpenAI client.
- Specify a local host URL and connect to your preferred LLM. Here we connect to, DeepSeek-R1.
- Enter a dummy credential in the Credential Configuration node’s password field (the username is ignored). This is required solely for the underlying OpenAI client in the DeepSeek Authenticator node.
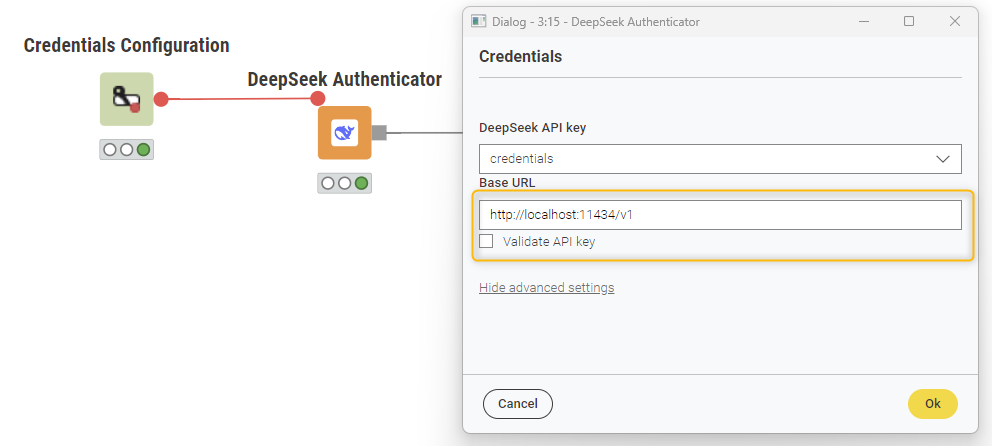
- Select this dummy credential as a flow variable in the DeepSeek Authenticator and configure it to connect to the Ollama server by specifying the local host’s “Base URL” in the corresponding field under advanced settings: http://localhost:11434/v1
- You can find the base URL for a local host in the Ollama press release on OpenAI compatibility.
Note: Make sure the "Validate API key" box is unchecked (see below).
Step 2: Connect to DeepSeek's R1
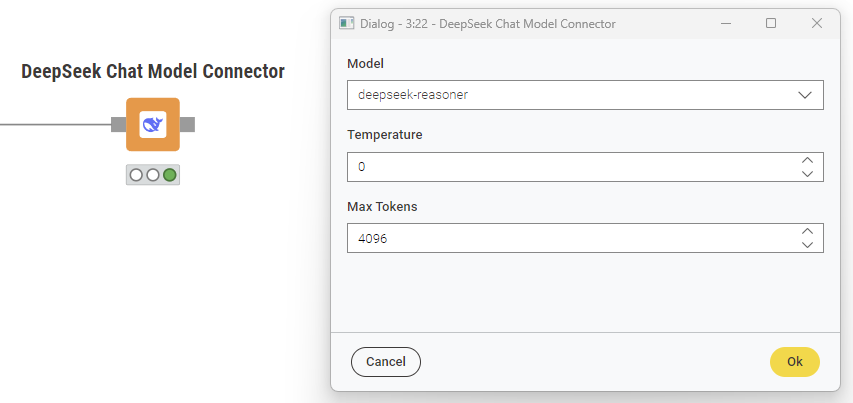
- Drag and drop the DeepSeek Chat Model Connector node and link the input port with the DeepSeek Authenticator node’s output port.
- In the configuration of the connector node, select the model, specify the temperature and keep the default setting for the number of max tokens.
Tip: Keep in mind that reasoning models typically require more tokens to generate responses, as they present their answers in a detailed, step-by-step manner. Setting a high number of max tokens helps prevent truncated outputs.
Step 3. Prompt the reasoning model
To query R1
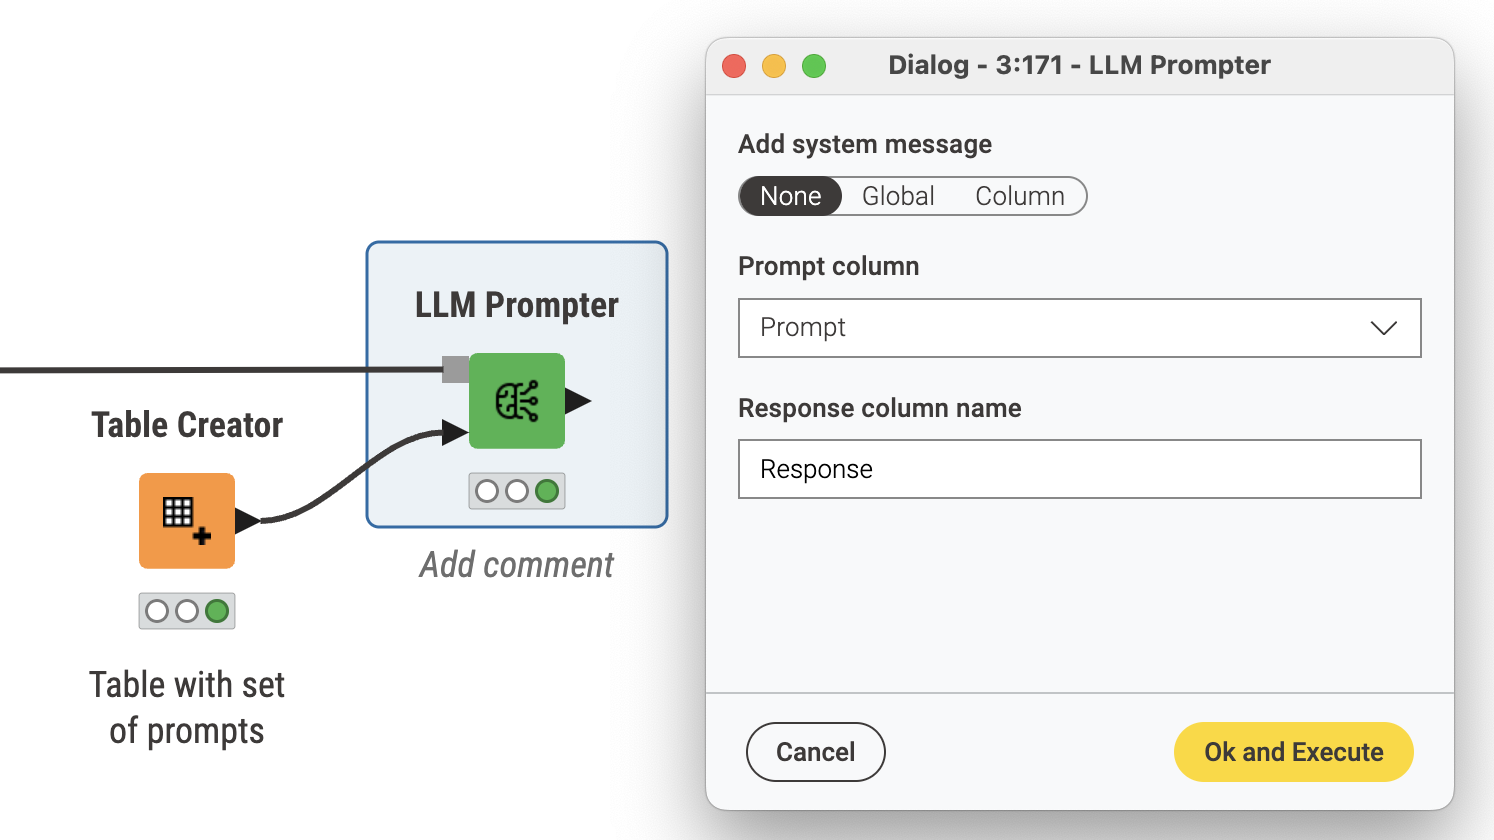
- Type your prompt in the Table Creator node. In more complex scenarios, use the Expression node to type and format the prompt, taking into account columns and values in a dataset.
- Drag and drop the LLM Prompter node. This node receives the model connection and prompt as inputs, generating the model’s response as output. The response is displayed in a separate column, which can be named as desired.
Access the latest advancements in AI with the KNIME AI Extension
The new AI capabilities reinforce our commitment to developing an open source platform that makes working with the latest advancements in data and AI possible, and offers the flexibility to work in the tools and environments of choice.
Explore the KNIME AI Extension.